This project worked great with Grade 3, but can be done with any grade. We made birds, as I wanted to focus on simple basic shapes kids could easily do (in this case two circles and a triangle) but I have done any other drawing kids like, such as dinosaurs, jelly fish, jungle animals, ballerinas, beaches….. this is pretty flexible.
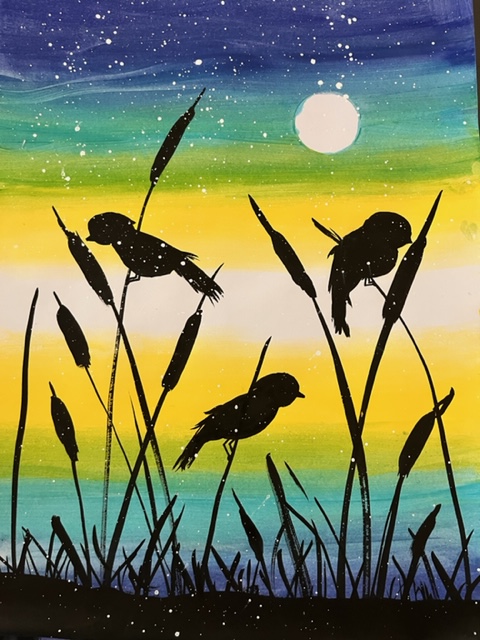
We started by painting the background, each table got a mix of 3 colors, some got blue/purple/white, others yellow/blue/white and others orange/yellow/white.
Demonstrate how to blend in the colors, starting with the center painted with white. From there move up and down using the same colors (as it would be in a reflection, look sample), blending from light to dark. Let dry. We also stuck a circle with tape at the top before painting, this was a moon. It worked ok for most kids. If it did not work out once dry they painted again with white acrylic.
We used black Chinese Ink to draw grass, some long almost touching the top and the bottom covered with black and shorter grass. Students also drew 3 or 4 birds around, we practiced one class using our sketchbooks and then we moved on to the painted background. If students did not feel confident using the brushes and ink, I let them draw the birds with markers once the grass was dry. About 3/4 of the class did with a brush. Skip the beaks and legs, you can use markers for those as it can be tricky for little hands.
Once dry I let them splash white acrylic paint on top. I heard a lot of good compliments from parents, many had to go buy supplies as the kids wanted to repeat at home!
Look no further, here you have ideas to have your students busy with Chinese New Year Themed Art Projects!
We have been busy from Pre Kinder to Middle School creating CNY themed artwork. The upcoming year is the year of the Tiger, so we have all sort of Tiger projects decorating our walls.
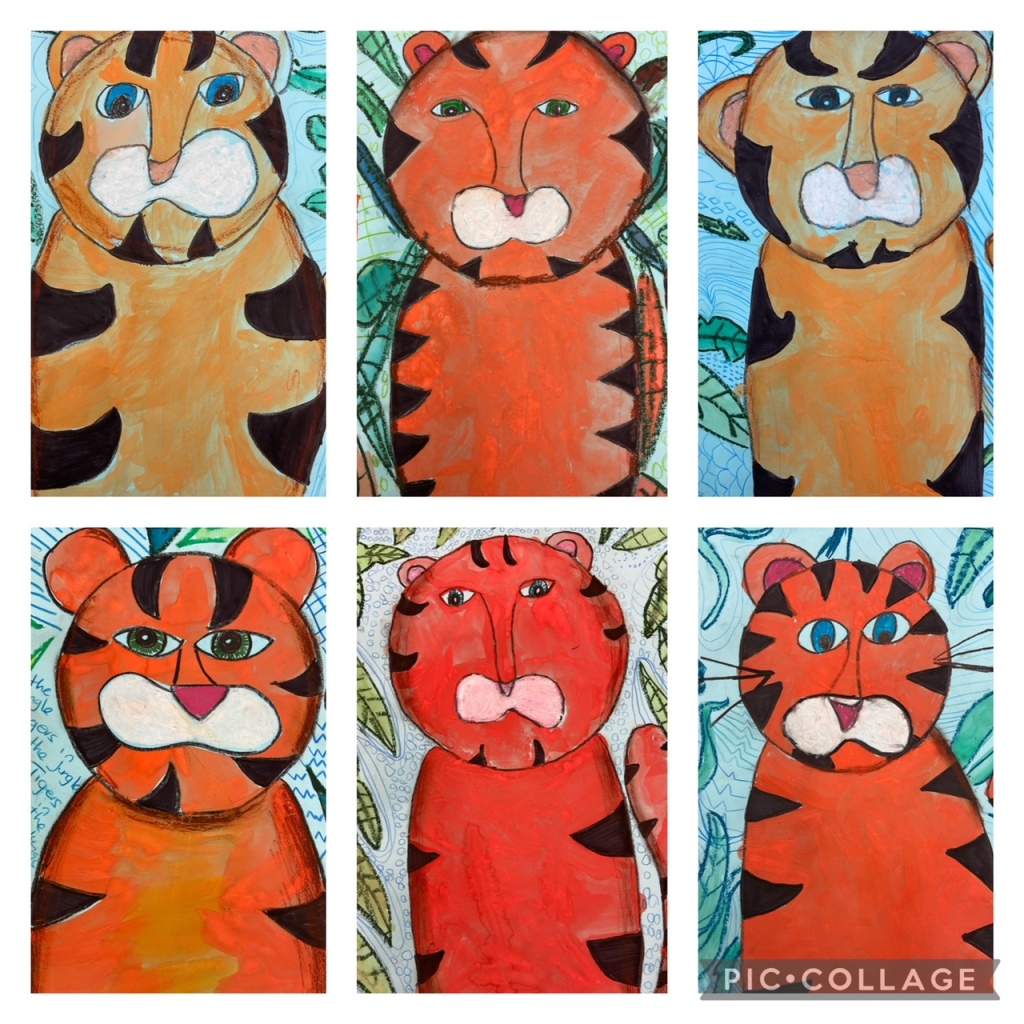
My youngest students from Pre Kinder made the cutest cartoon style Tigers:
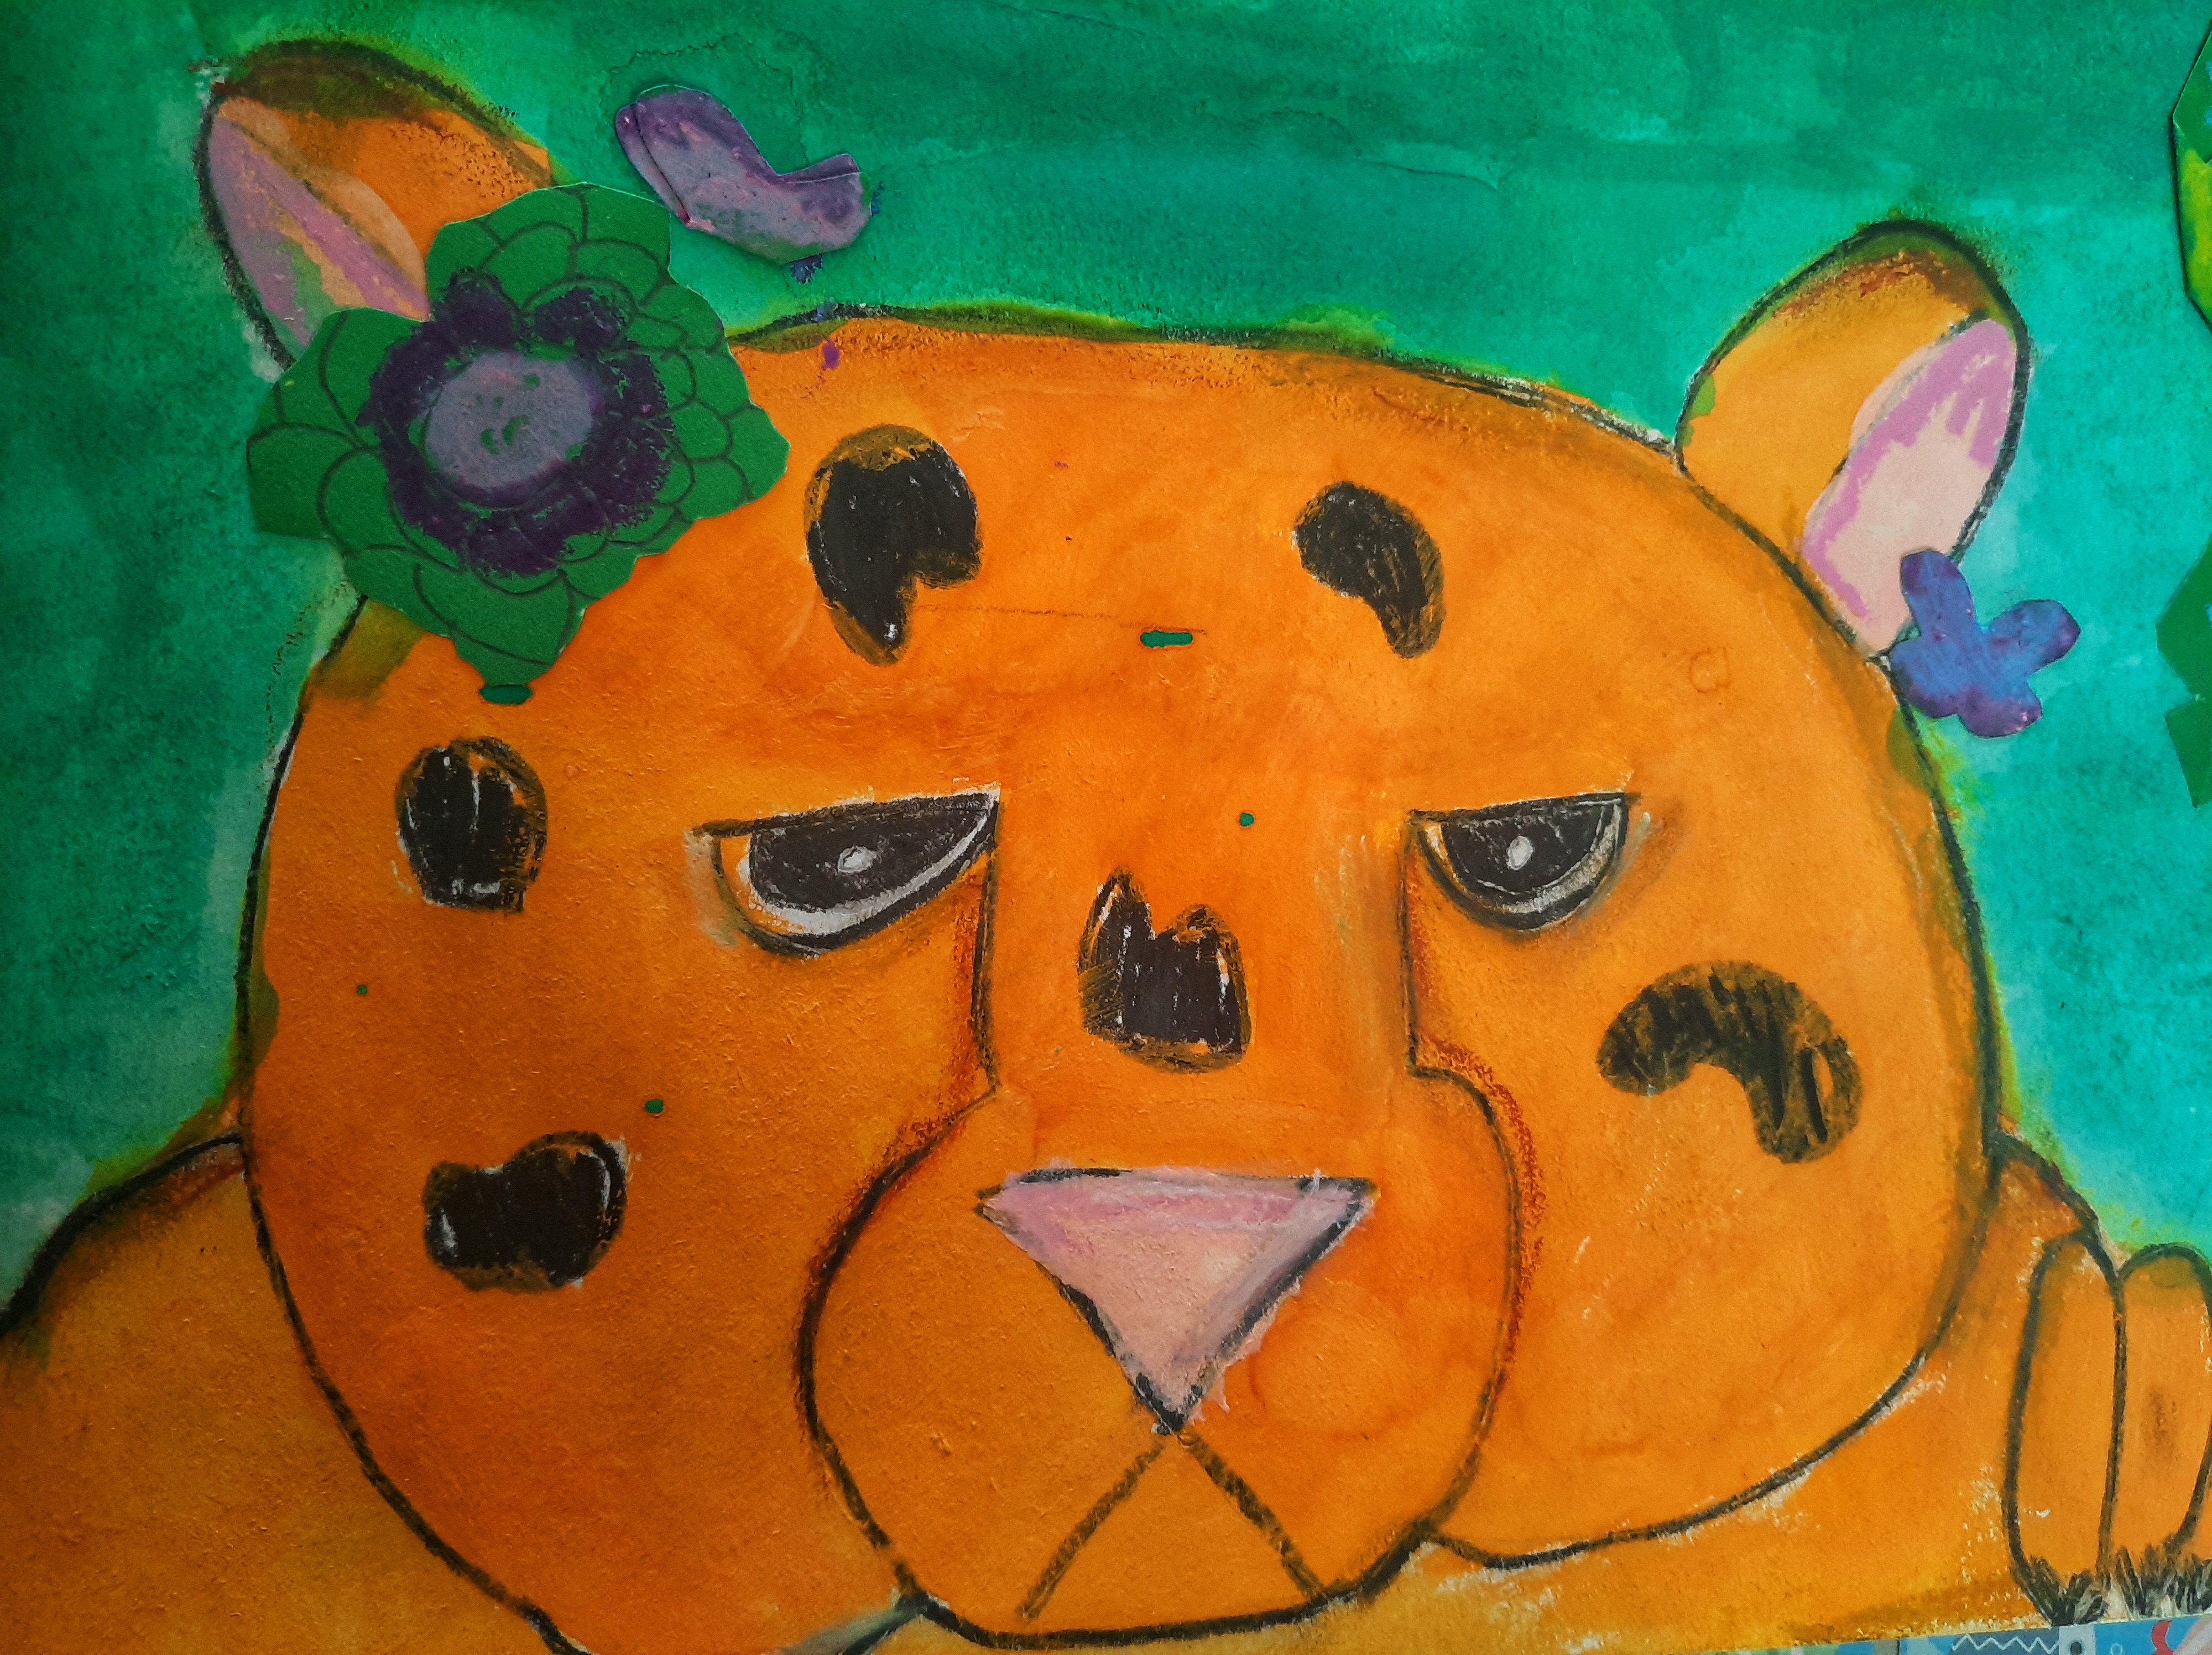
This was simple to put together, and students have been great at learning to listen before working (quite a challenge at their young age and painting supplies in their hands!). We did a directed sketch, first we outlined (pencil) a simple oval shape for the head using a stencil and added two lines for the tiger body as well as two ears in the sides of the head. Once the outline was done, we painted with warm colors the tiger shape, let it dry and then we painted leaves using cool colors. Once all was dry, we outlined the Tiger shape with a black marker, and I directed them step by step on how to make a simple yet cute face, and then they added the stripes. To add a more finished touch, we used green crayons to outline and add detail to the leaves we painted previously. They look adorable!
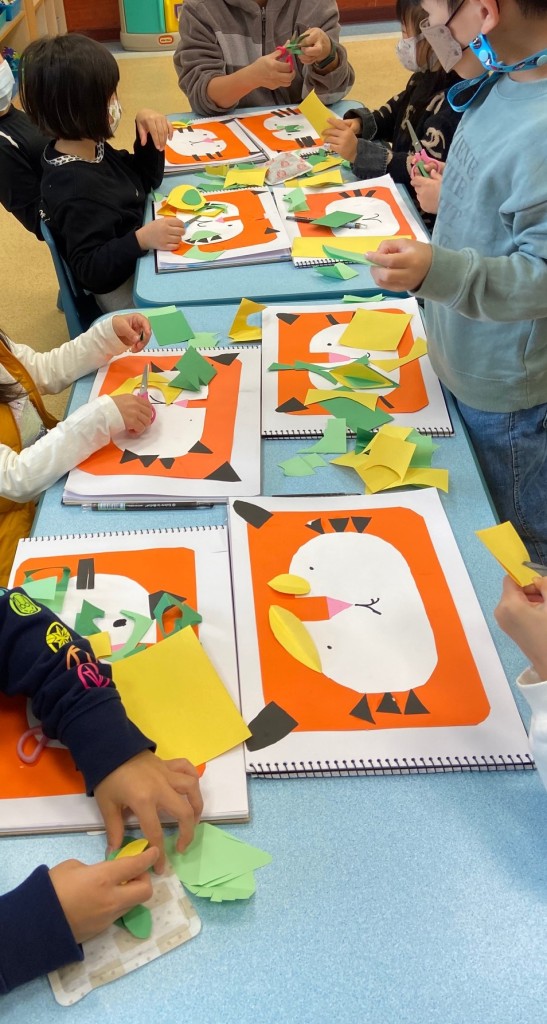
Kindergarten students made a Tiger Collage. They got stencils and different colors of paper (construction paper). They were busy for 2 classes cutting and assembling they lovely Tigers. They added the eyes and mouth using a black marker. The picture below shows the half way through project, they were adding leaves around the face using both green construction paper and patterned paper.
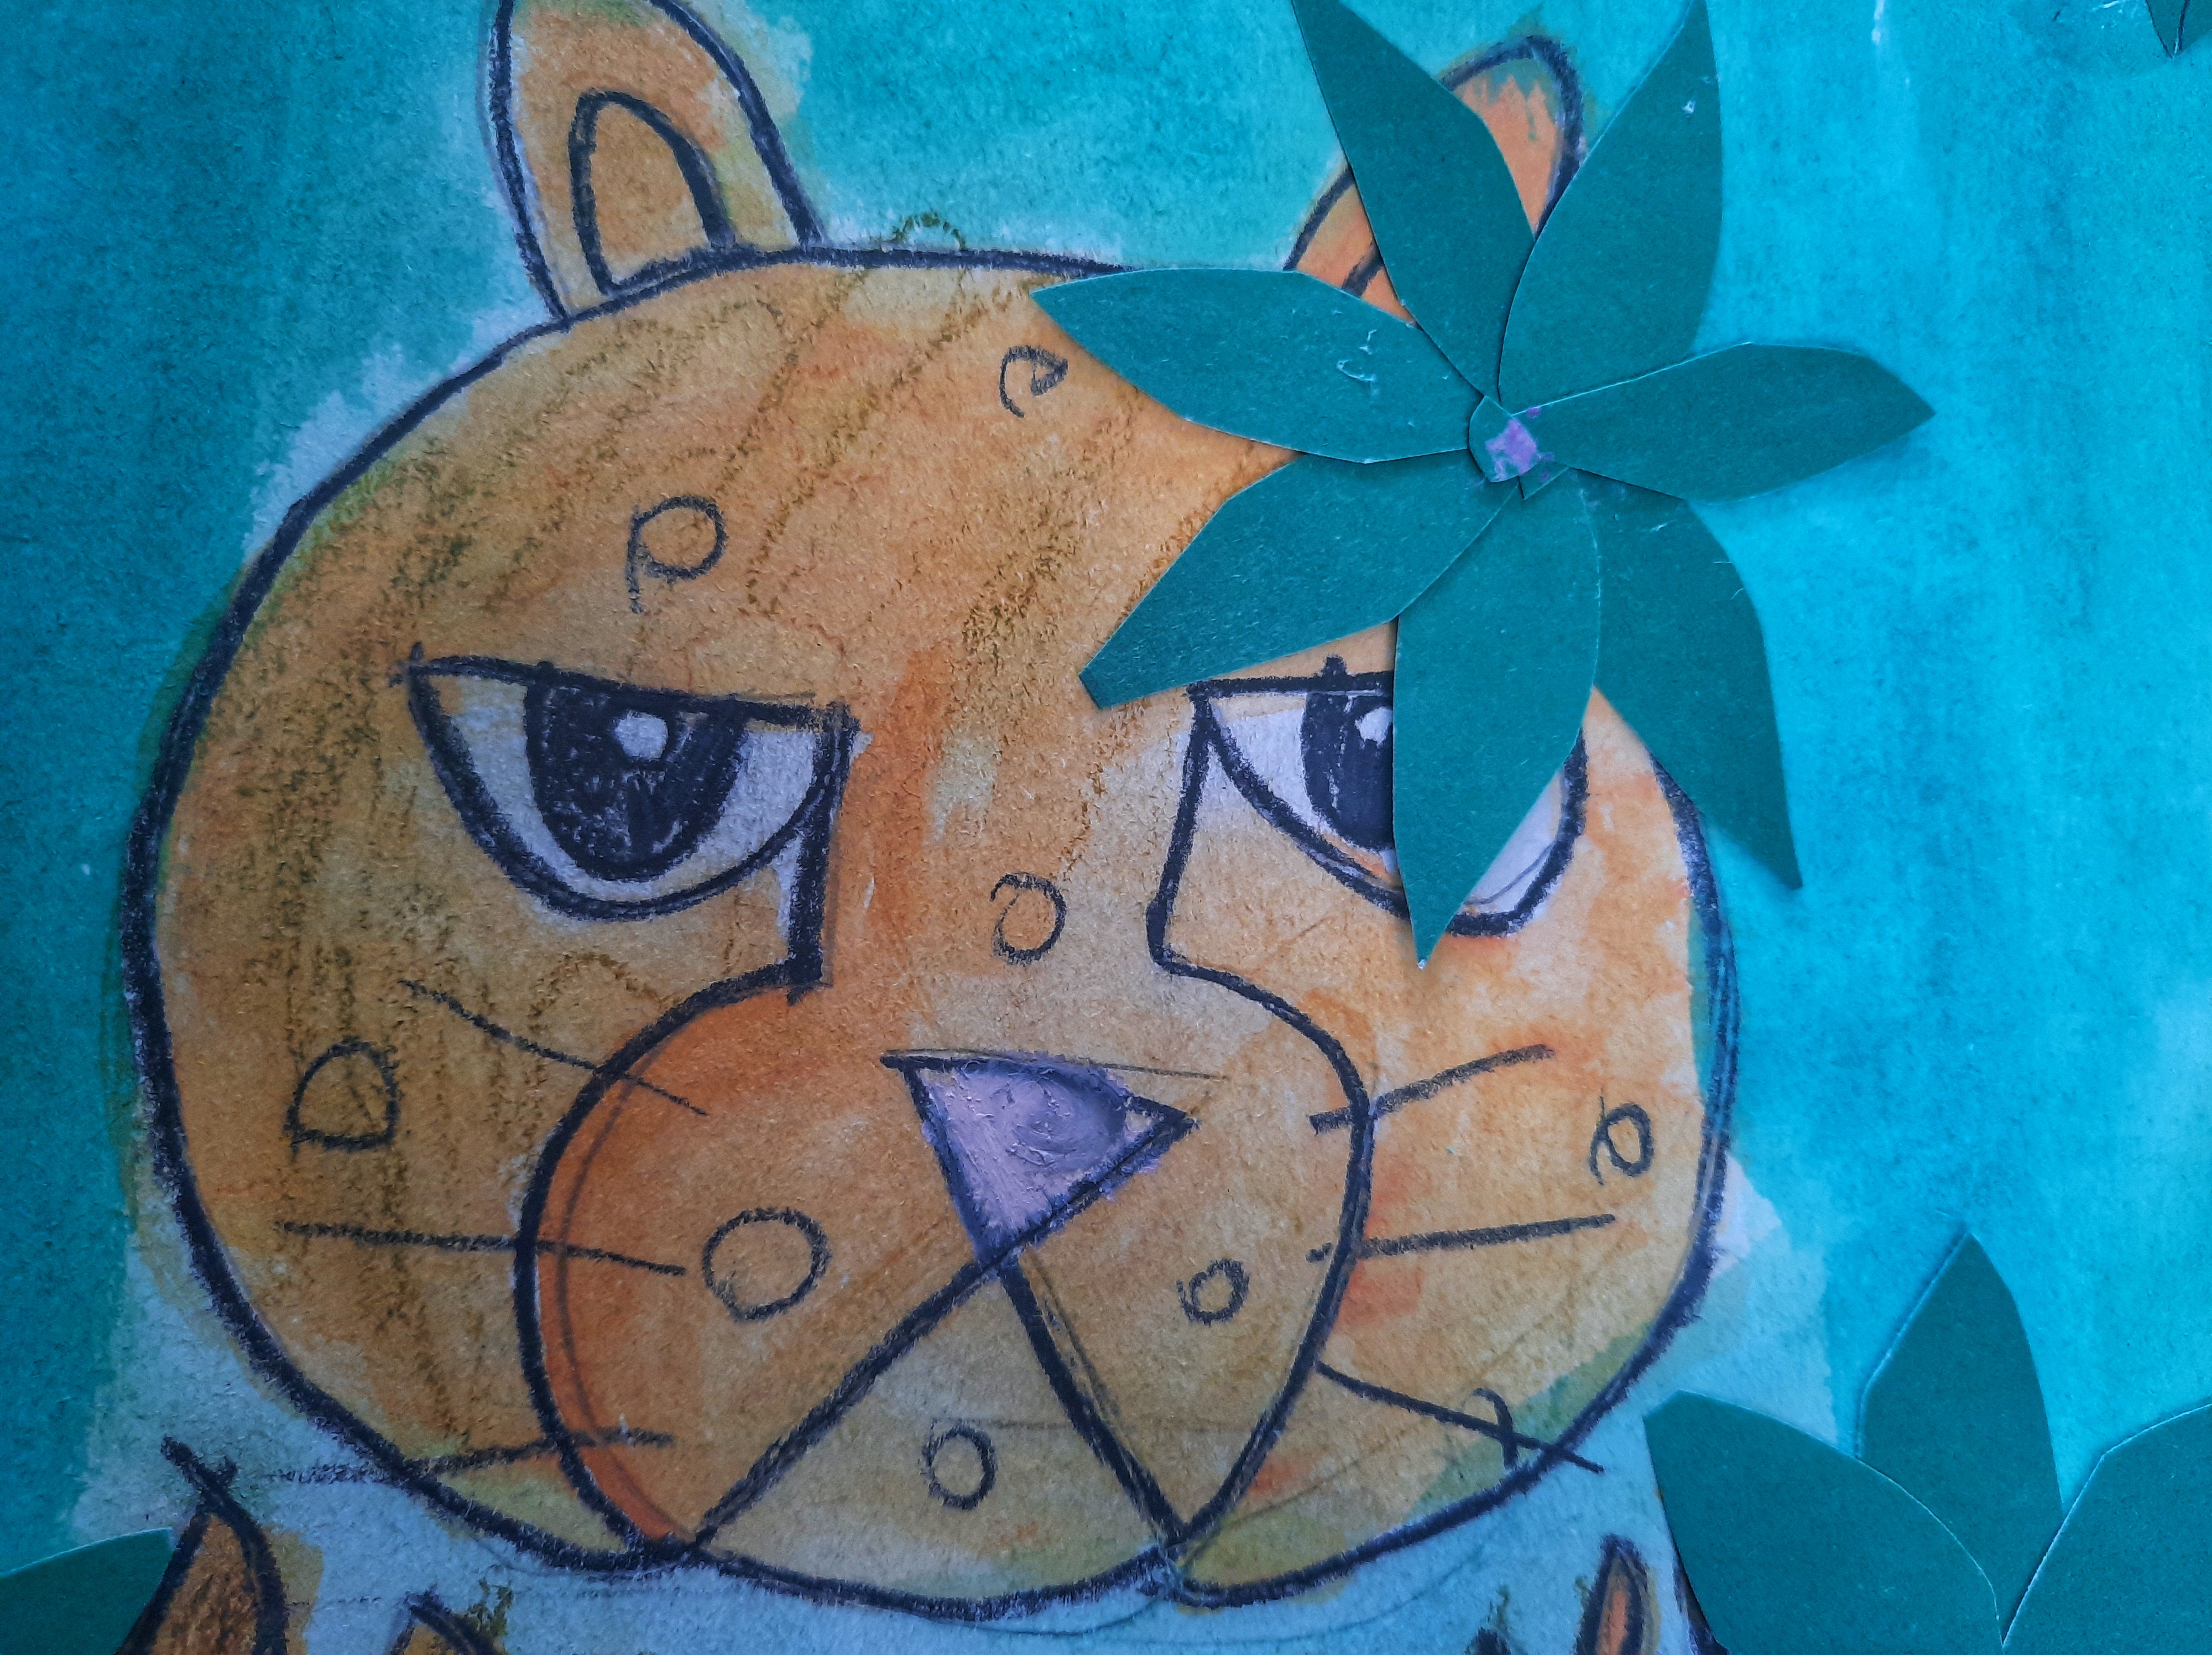
Grade 2 students made a similar version, with a more sophisticated Tiger. I directed a sketch (practice first in either a sketchbook or scrap paper) and then we redo on a light blue piece of cardboard. Proceed to outline the whole drawing with a black crayon, including the eyes; I asked them to leave a small circle in the middle of the eyes to resemble light. The crayons that you spiral up are user friendly, but any thin black crayon works for this wax resist. Once outlined, they painted the Tiger, using tempera disks, just make sure they add a lot of paint and not too much water, because the paper is blue; at this point do not pay attention to the stripes. The stripes were filled with a water based black marker and students then drew leaves with green oil pastels. I also handed them brown oil pastels to add a bit of shade on the sides of the body and head, as well as white and pink to fill in the nose and whisker area. On our last day I asked students to fill the empty space found on the blue paper, with any pattern they preferred using colored pencils, once the space was filled, they water colored the leaves (previously outlined with crayons). Loved this project!
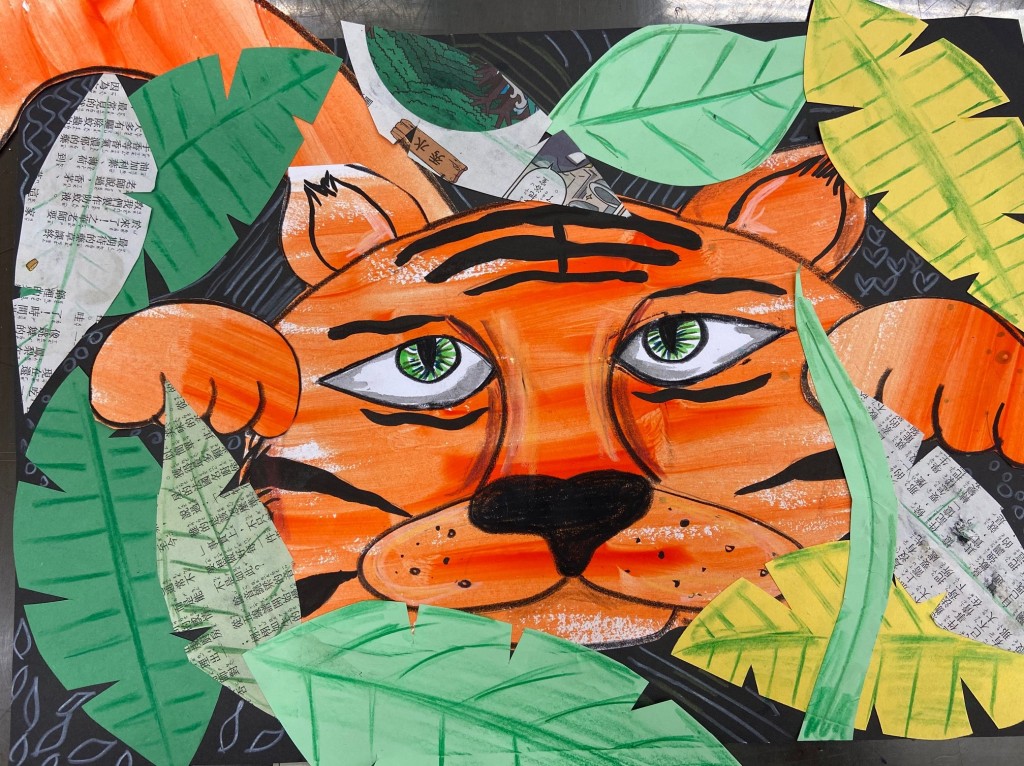
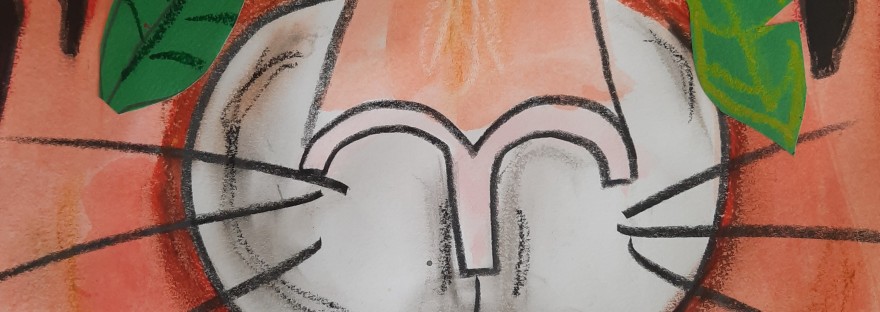
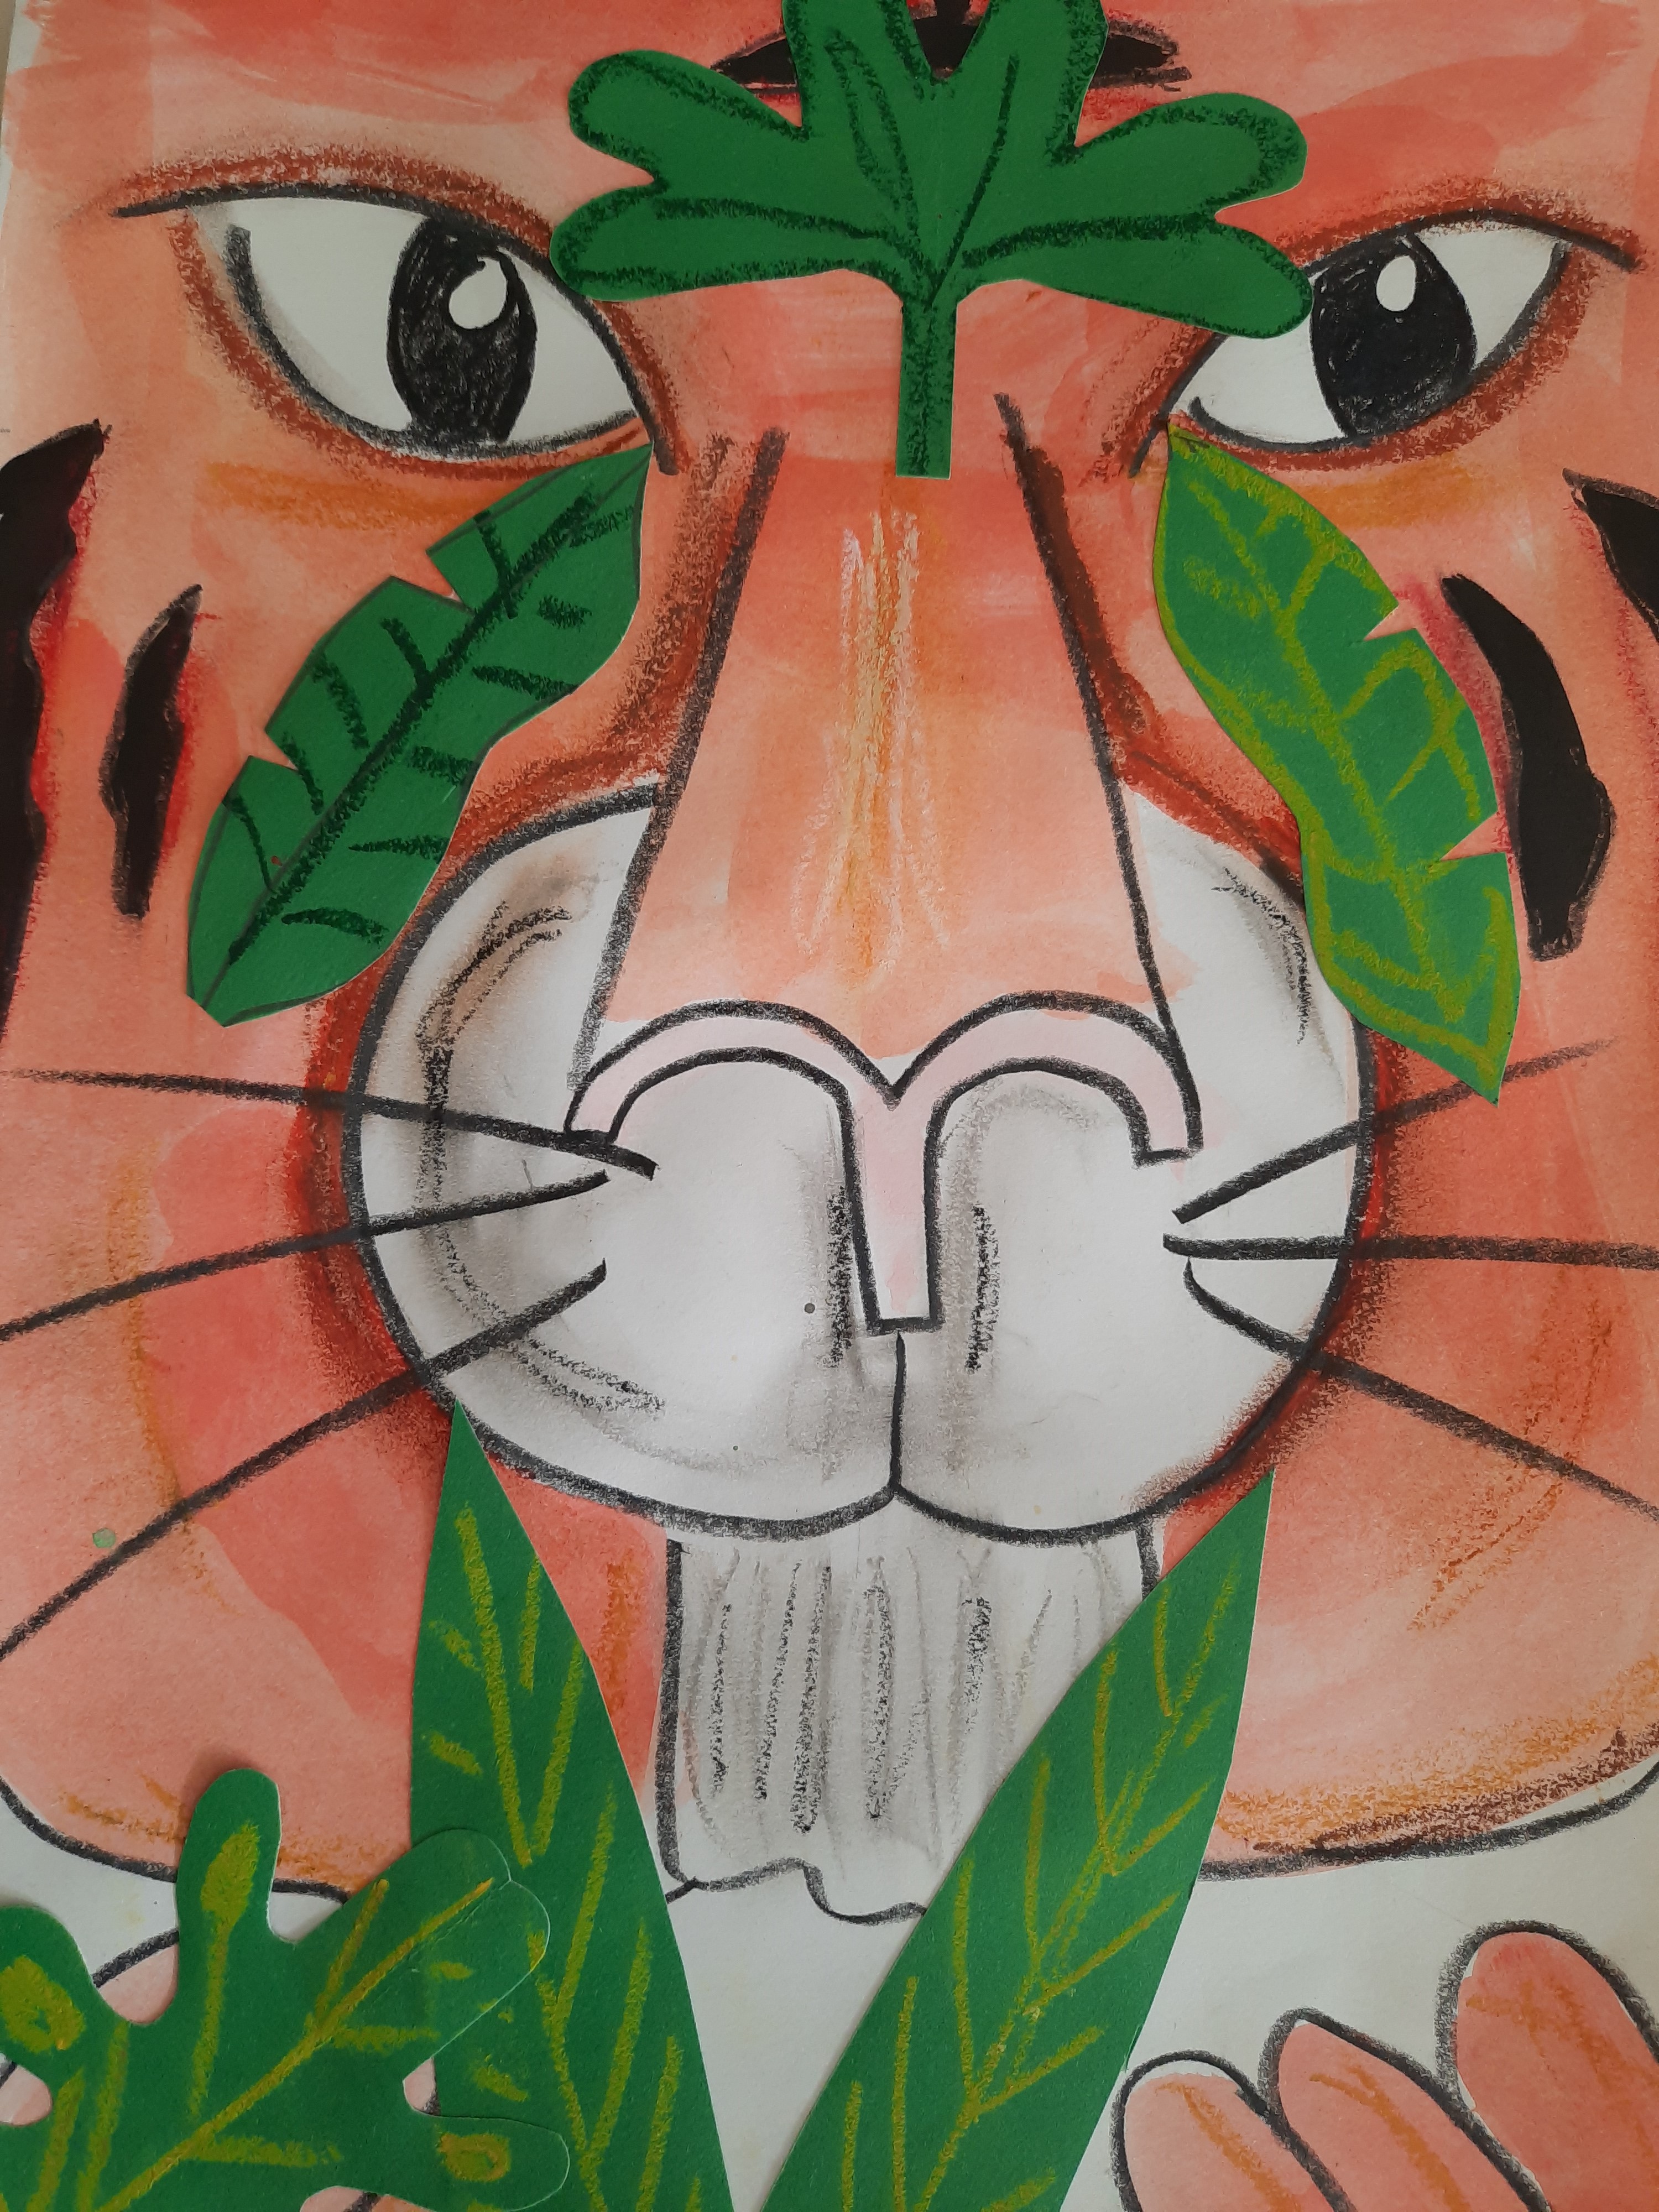
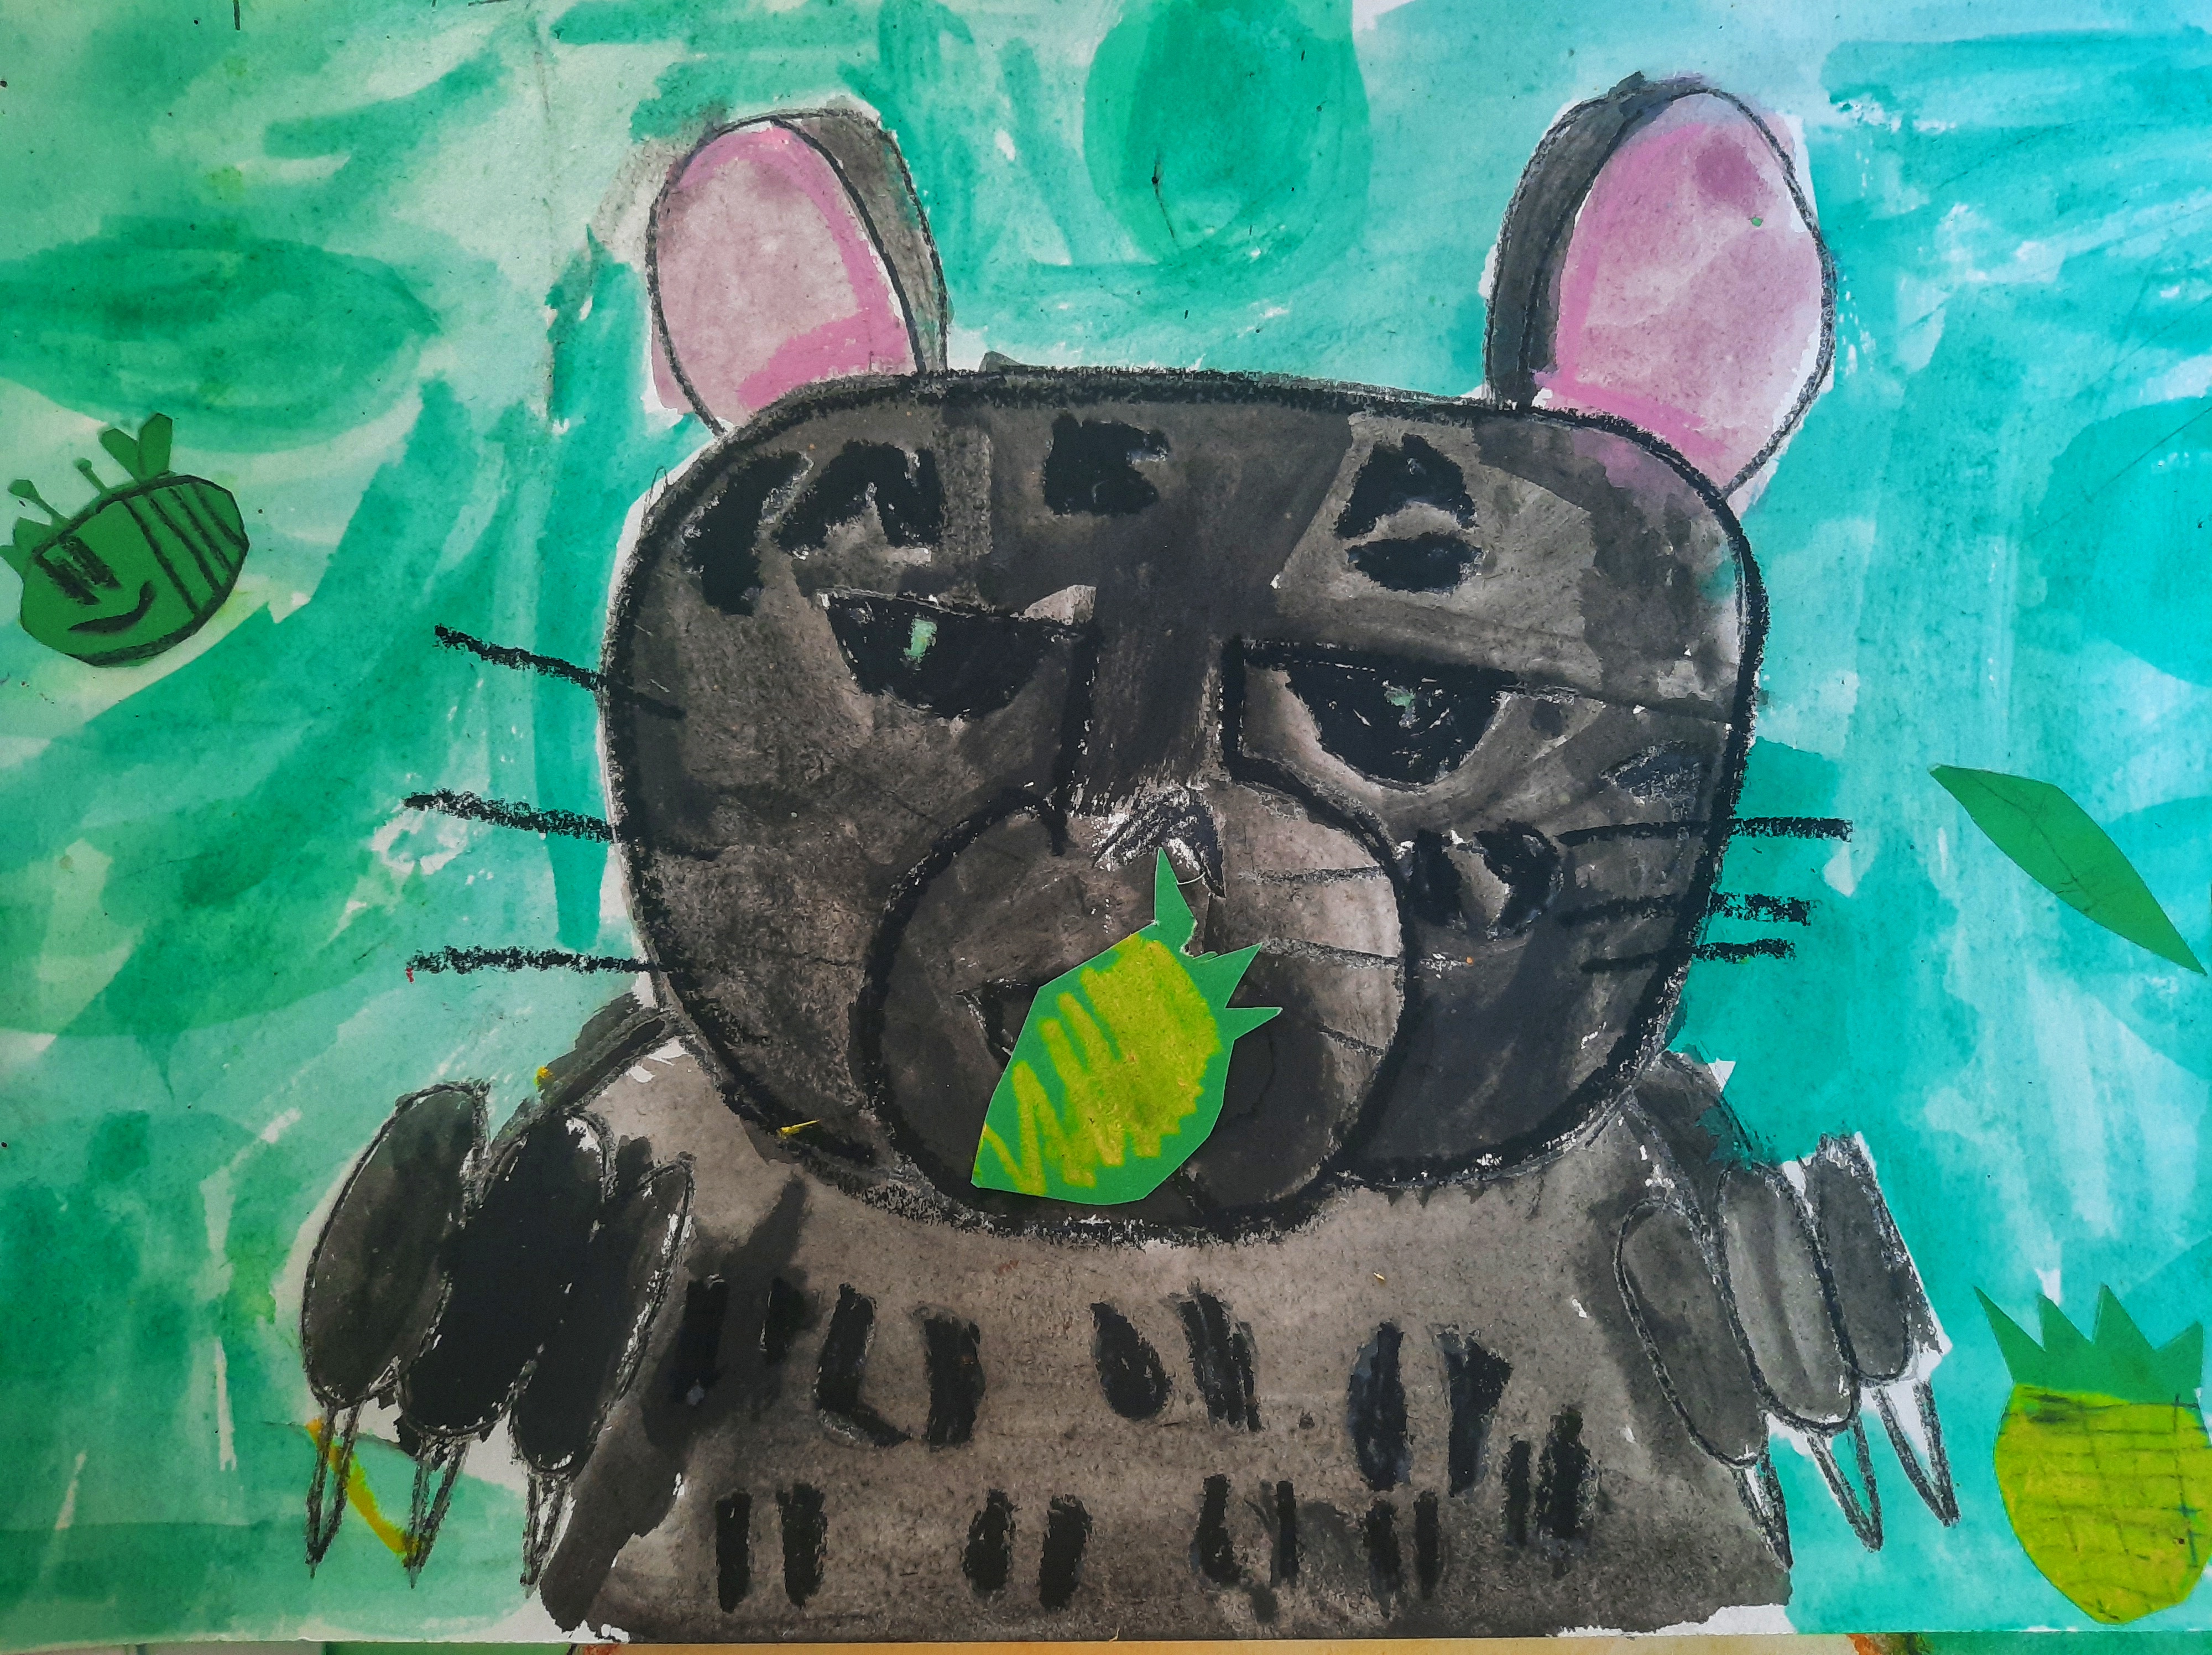
Grade 3 students made a mixed media Tiger. We started by painting 2 sketchbook pages with orange tempera paint. I specifically asked students to be rough as we wanted to see the strokes and some blank patches. We then sketched a yet more sophisticated Tiger in one page and a tail and two paws in the other, practice once in a different page or scrap paper, then move on to the painted pages. We outlined the sketch using black crayons and added eyes using white cardboard (draw, cut and stick). Make sure you cut on a folded paper so the eyes are symmetrical. We then cut many leaves using different types of paper: cardboard, construction, newspaper and/or patterned paper. I handed a black piece of cardboard to attach all the pieces we had cut, but I asked them to play with the composition first. Once all was well glued, we added detail using colored pencils, same as the project above, we filled the blank space (black cardboard) with patterns using a white color and added detail on the leaves using either black, brown, dark green or dark blue. They also added a bit of shading on the sides of the Tiger’s face and snout using brown colored pencils. Finally and super carefully, last day we added stripes using black Chinese Ink and a brush. We had the option to use dirty water (from the same ink and brush) to add a bit of gray around the white part of the eyes. Stunning!
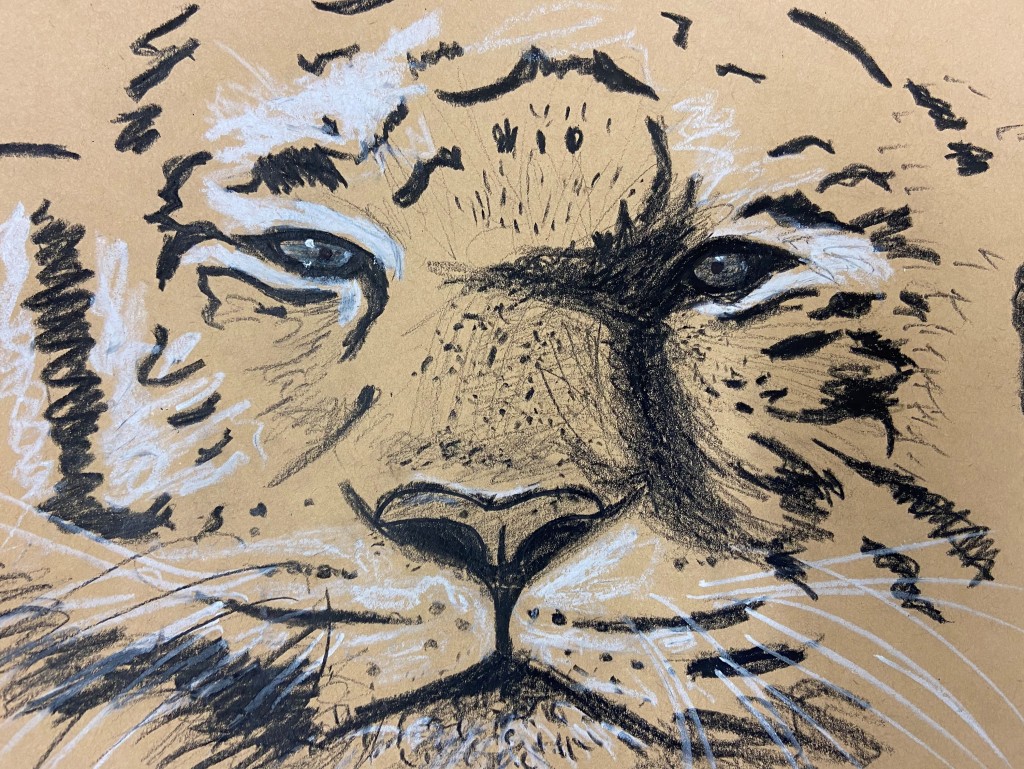
Grade 4 students used a image transfer trick to make impressive Tiger sketches. Visit my pop art post to learn how to use this technique here.
We started with different picture of Tiger faces. Students selected one and proceeded to use the transfer trick (linked above) to transfer the outline of the features into natural colored cardboard. Once you have a sketch and you can see were the features are, use a black marker to outline both the eyes and nostrils. We then focused on darker and lighter areas (the picture were black and white so this was easy to identify) and used black or white oil pastels as needed to add as much detail as possible. Pay attention to the direction of the fur and it is a good day to introduce students to monochromatic drawing and different values of gray. Because we transferred the outline of the features and stripes first, the real looking Tigers look impressive on our windows. Last and final step was to add a bit of color to the eyes and a dot of white (using oil pastels) to mimic light reflection.
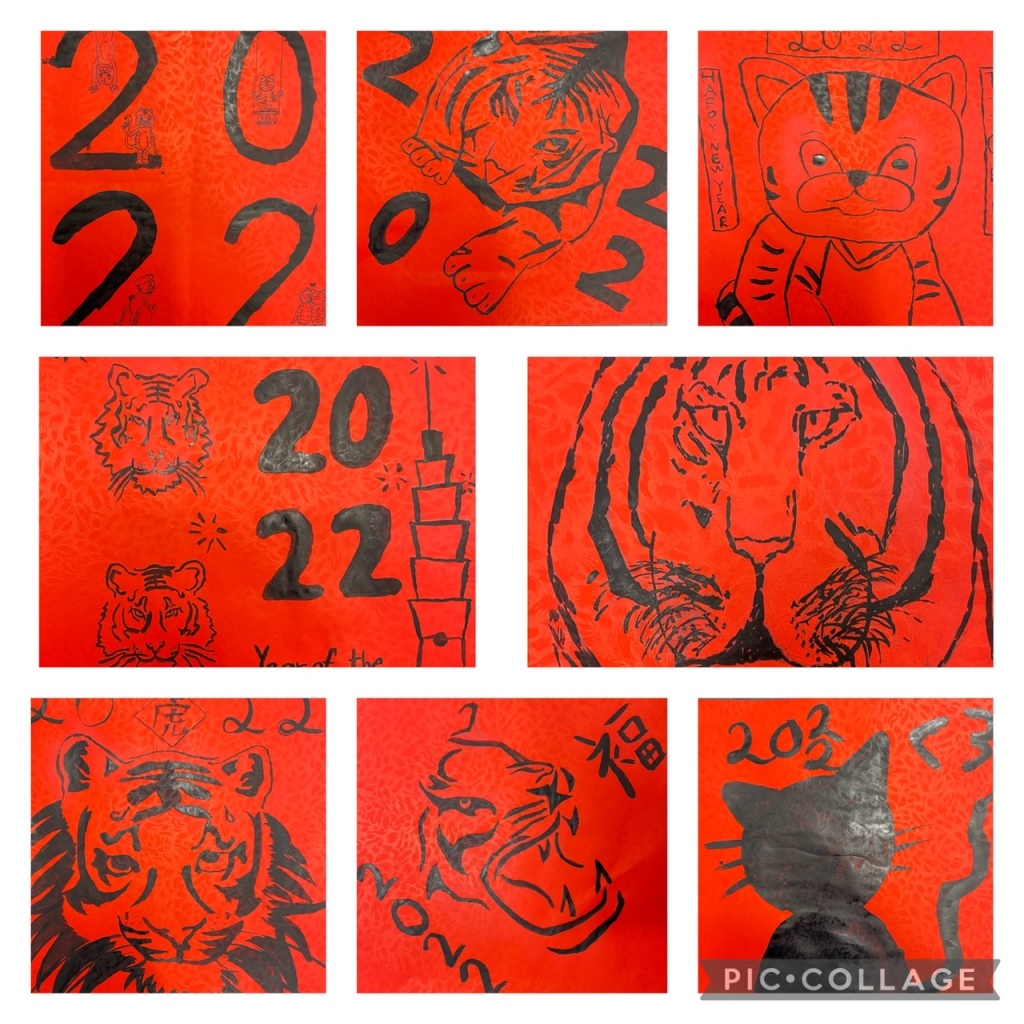
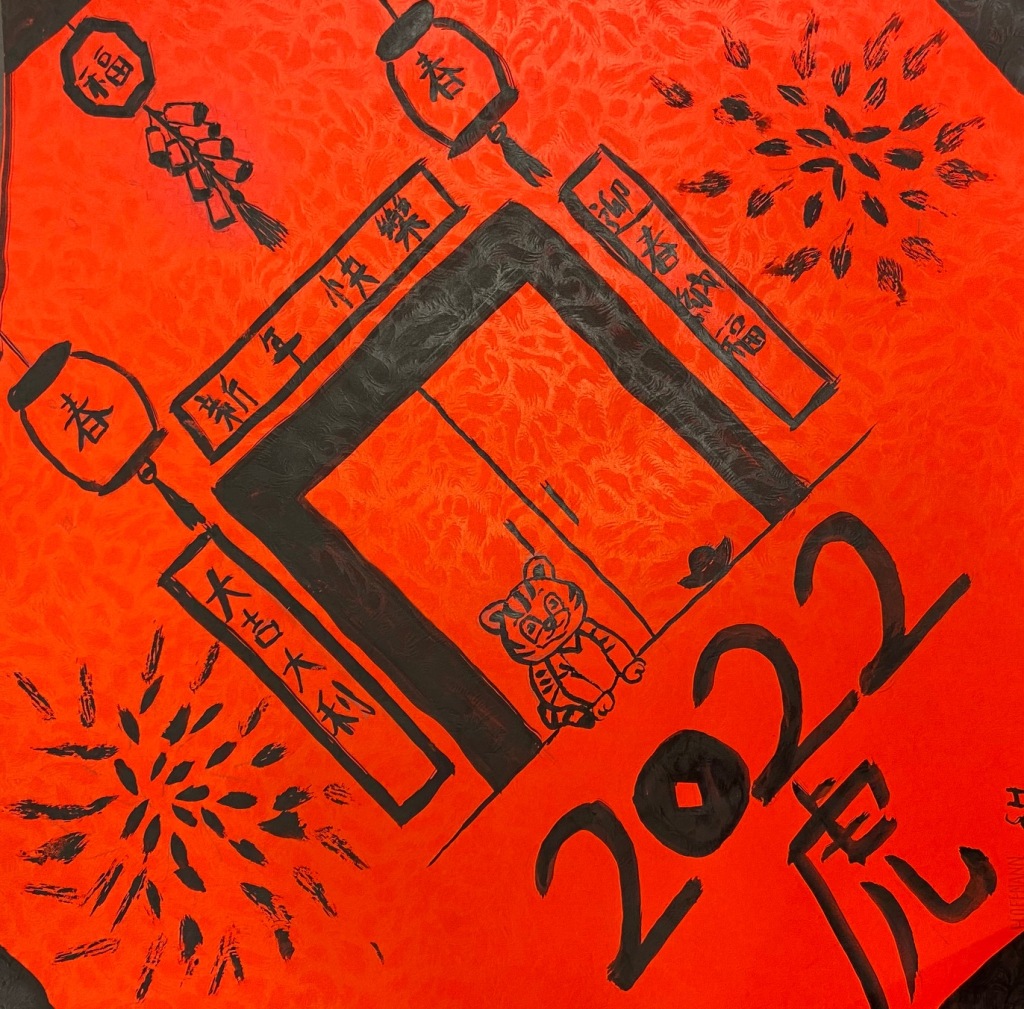
Grades 5 and up designed a traditional CNY poster. These are done on red paper and are painted with black Chinese Ink.
We always start planning and designing on our sketchbooks. This year I introduced them to the Design cycle and we talked about not getting stuck with one idea. I asked students to design 2 different posters in the sketchbook and then decide which they would use in the red paper. Choose a design and sketch with a pencil in your red paper; then very carefully use a brush and ink to paint it. Remind the students to work from down up, it is very common to end up with in in the back of the hands and then stain your posters.
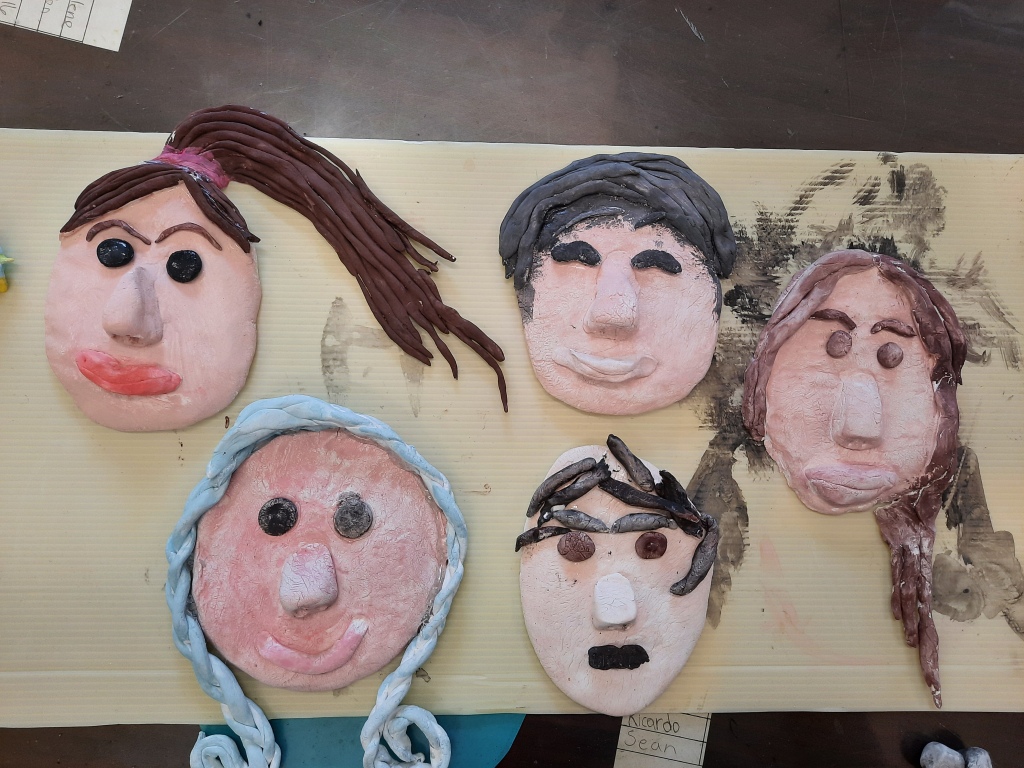
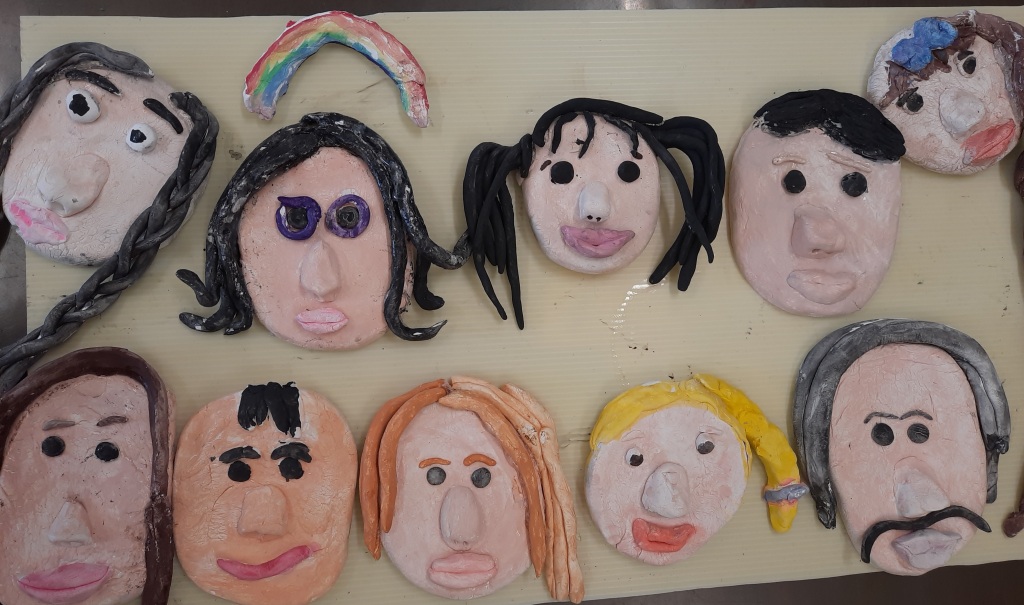
I wish we had a Kiln oven at my school, but this year I decided to make do with Air Dry Clay and I am so happy I tried out. I found inexpensive individual packages of it at a local store and it dries just like fired clay.
Grade 2 students started with 3/4 the package of clay, a ball the size of a large tomato, and rolled up into a ball. Once smooth and round, we placed on the table and gently pressed with the palm of our hands. I asked them to try to make an oval shape. I then handed the rest of the clay, and divided into 2 parts, then one of those parts again into 2. These last 2 parts we used for the eyes, nose and mouth and the rest of the clay for the hair. Some kids made braided piggy tails and it looked really cute.
We kept the shapes assembled but once dry, I asked them to try to peel the features off, to paint them more neatly. Most of them could, but 2 student’s sculptures were completely attached and they painted directly very carefully. We painted using tempera disks, for the sake of simplicity and it worked really well. Once dry, we glued everything up together using white Elmer’s glue, and I had a hot glue gun ready to attach a couple of portraits that had difficult to stick features (actually most of the cute piggy tails).
The experience was so awesome that I am sure next year we will do one air dry clay project per grade.
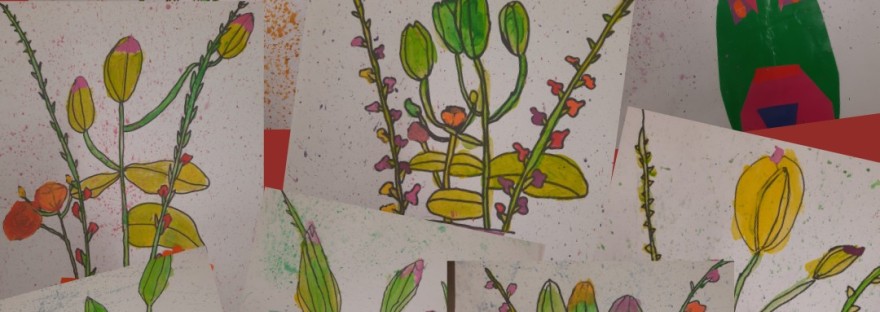
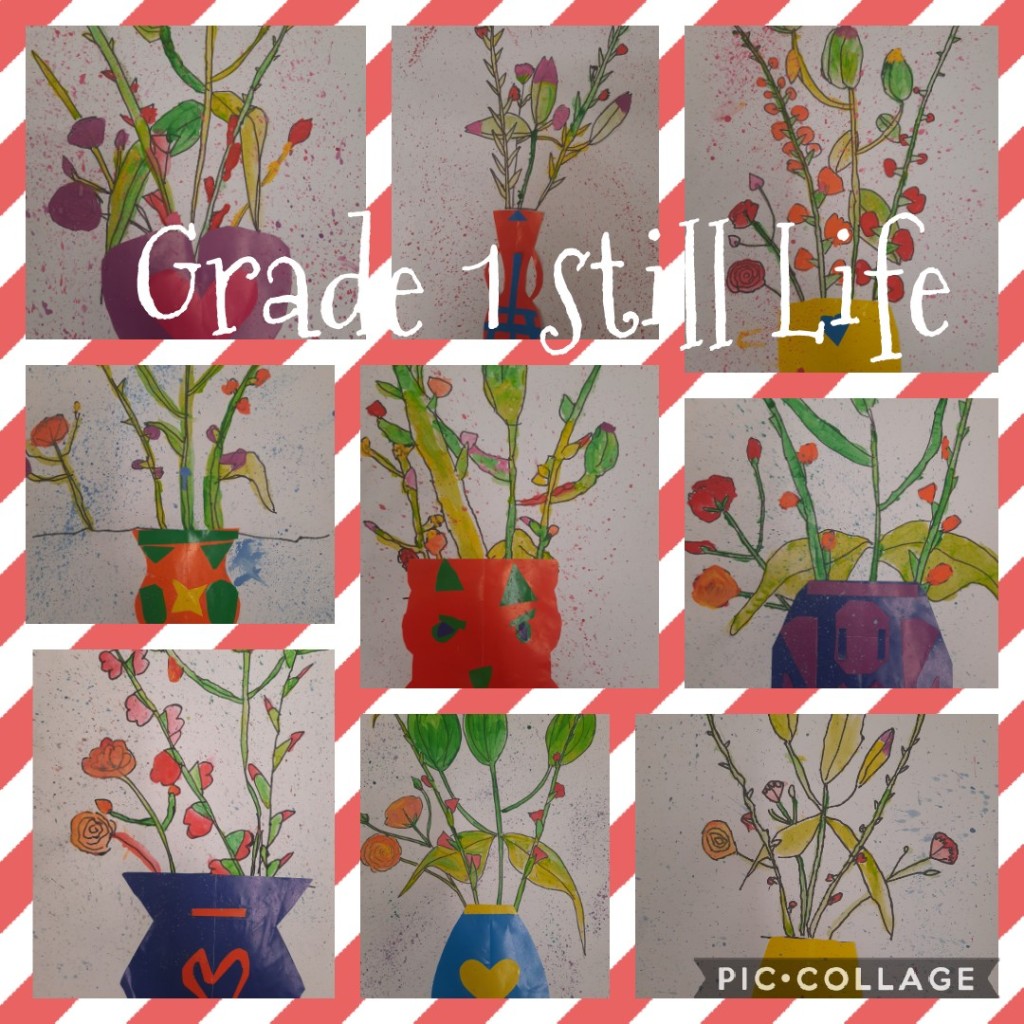
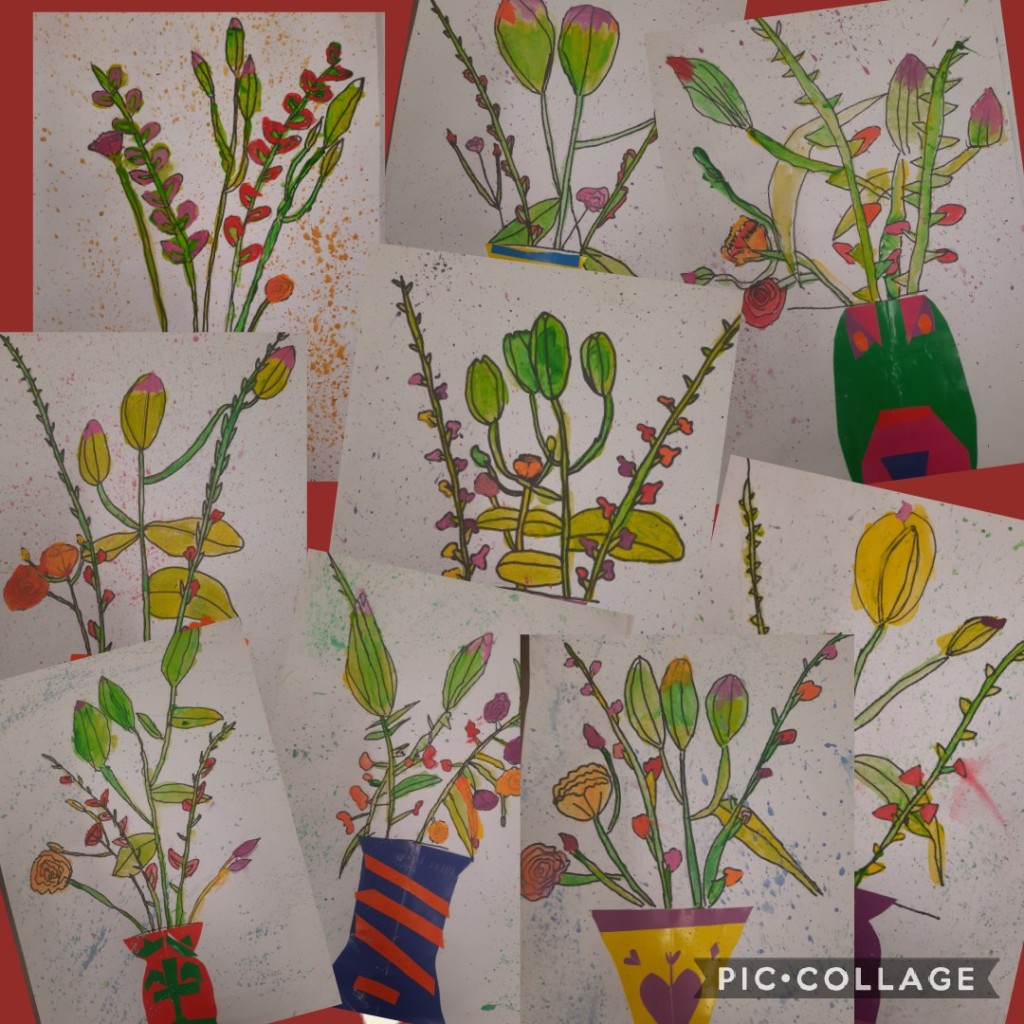
Every year I buy a bouquet of flowers and bring them to the classroom. There is something special about having fresh flowers around and I use them with most of my classes, from Kindergarten to Middle School.
My youngest students got a directed sketch, I was drawing the flowers myself, step by step and kids were observing and sketching their own flowers following me. I gave them A3 cardboard and asked them to put their fingers in the middle of the paper, then move the finger down a bit and make a small line (a small line a bit below the center). We made sure to start the stems from that line, nothing below, so we have space for a vase later on. Once the pencil sketch was finished (one class) we outlined them with a permanent marker, usually I give crayons to my youngest students, but this year I upscaled that and the artwork looked terrific. Once the outline was finished (another full class) we painted the stems and leaves. I like to use a double dip technique and tempera paint, meaning I put a green/yellow palette and ask students to dip in one color followed by a dip in a second color (no mixing), then they paint their stems and leaves carefully (we used small brushes) and when we have no more color, we double dip again using a different mix. I was a bit worried with my grade one students, as the stems were quite narrow, but they totally impressed me! Telling them that I trusted them with my good brushes and the paint helped a lot 😉
Next class I gave them a warm color palette (add white, it will bring lots of light to the flowers), and they used the same technique to color their beautiful flowers.
Finally, last lesson was on symmetry and they designed their own flower vases. I projected many different shapes of vases (google vase outline) and asked them to choose one. We talked about symmetry and a simple trick to make sure our vases would be perfectly symmetrical, we folded a piece of colored paper in half, designed half the vase (on top of the fold) and then cut out. When you open the paper (unfold it) you will find a perfectly symmetrical vase. I gave extra paper to add details on their vases, then asked them to glue them on top of the stems, some kids had a line traced with pencil, and they covered up the line with the vase. Once finished they could come to the front to splash paint using water, dry temperas and an old brush. BEWARE, kids love this part.
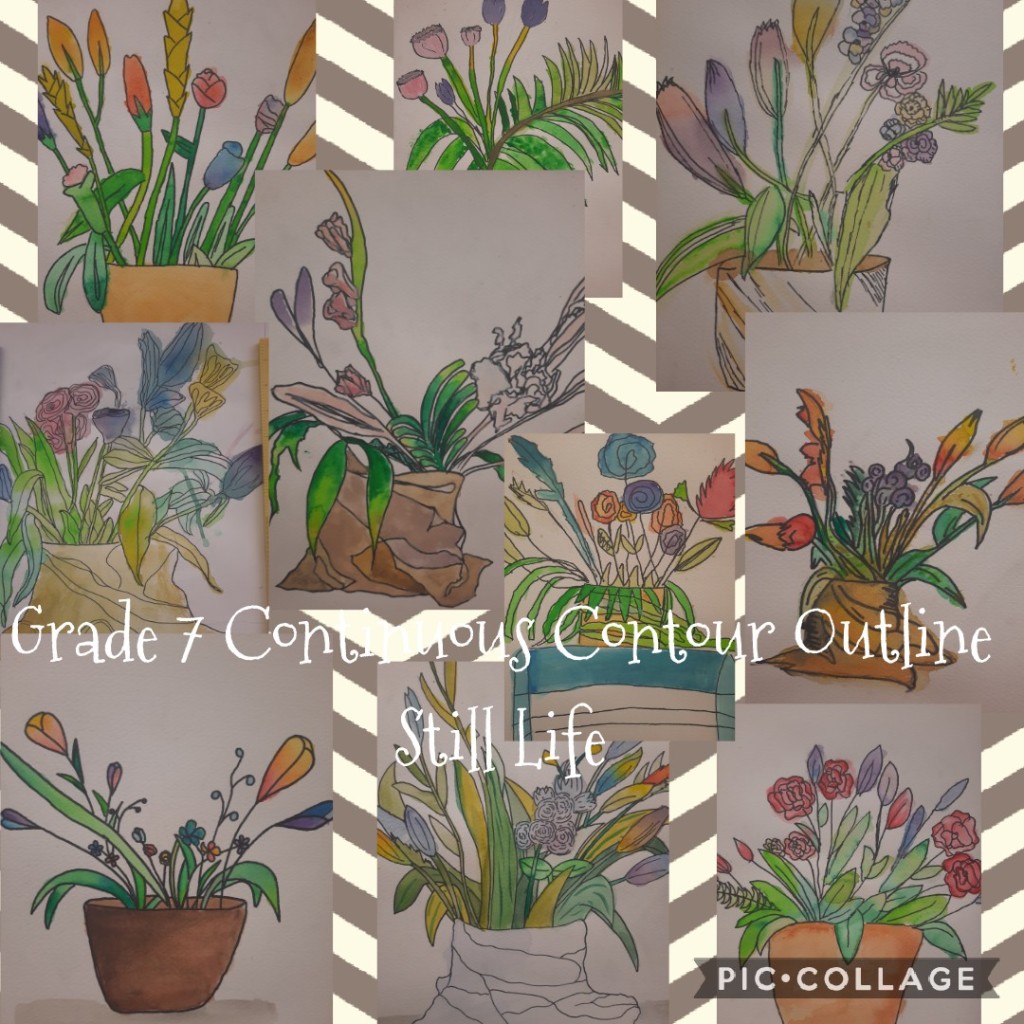
Older students got a different direction, I challenge them to use a continuous contour outline, meaning once they put the pencil down, it cannot leave the paper until they finish their sketch. Get ready to answer all sort of questions, like, can I go out and scribble on the desk and back to the paper? (as far as you don’t lift and clean up the mess, yes).
Once they finished up, they outline with markers, here they can omit lines if they wish, then erase pencil marks. I handed watercolors, not temperas, just to tweak it a bit, last year I asked G7 to use a double dip technique using acrylics.
Chinese New Year is coming up and all of my grades are working in different projects around the festivity.
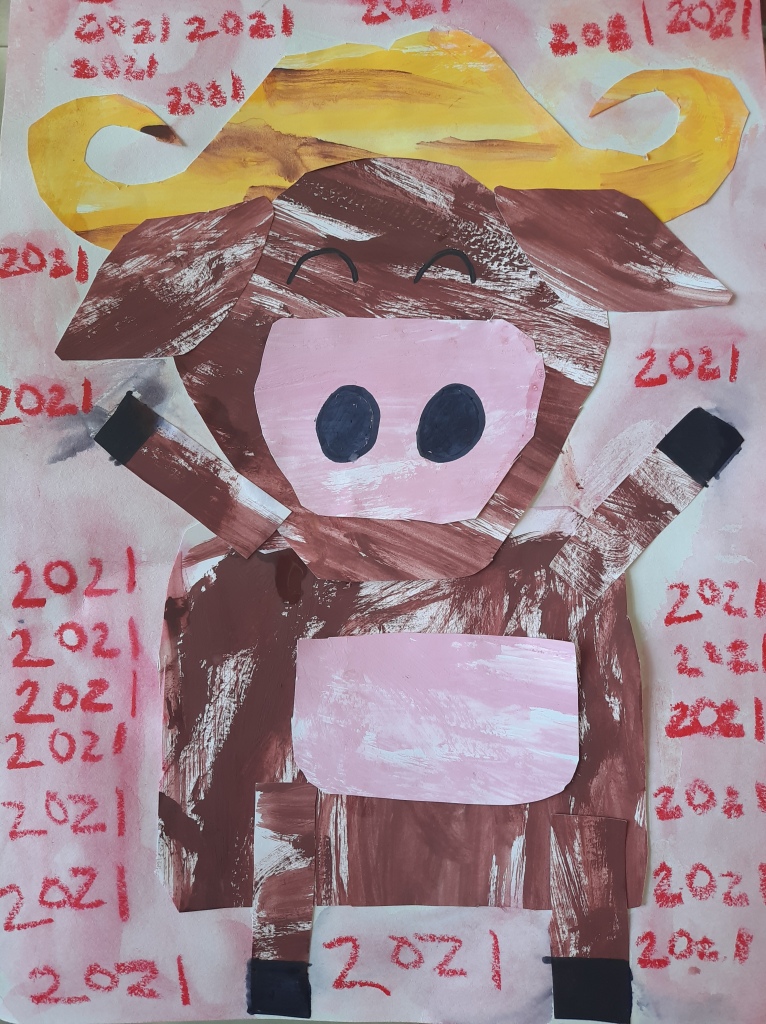
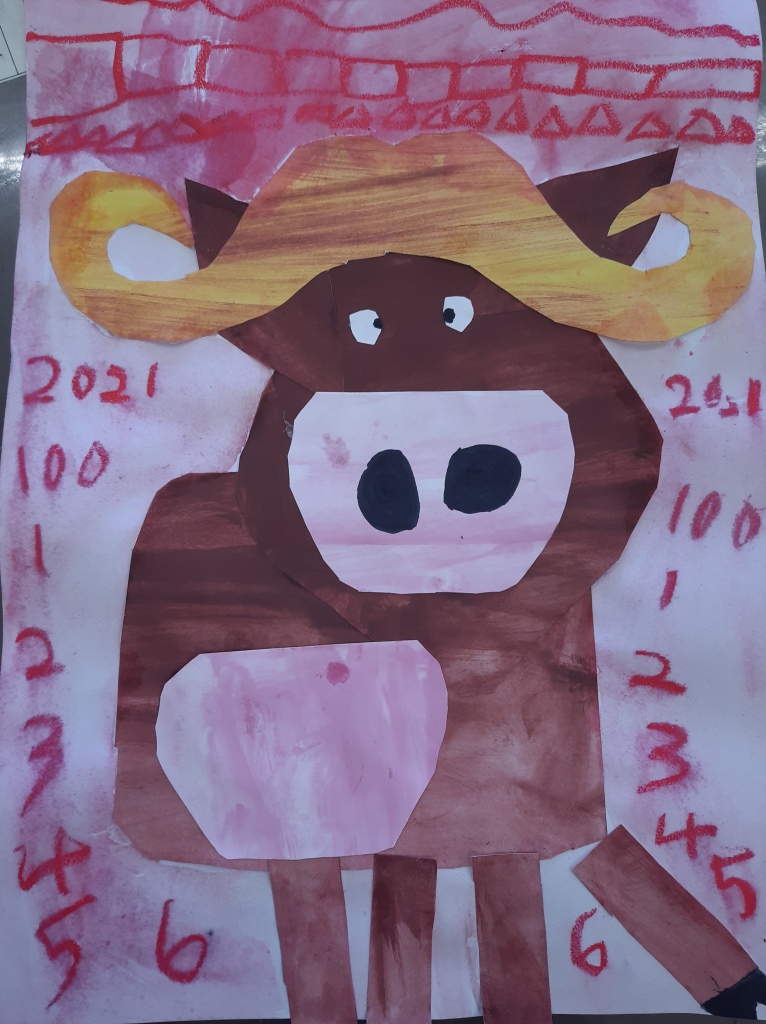
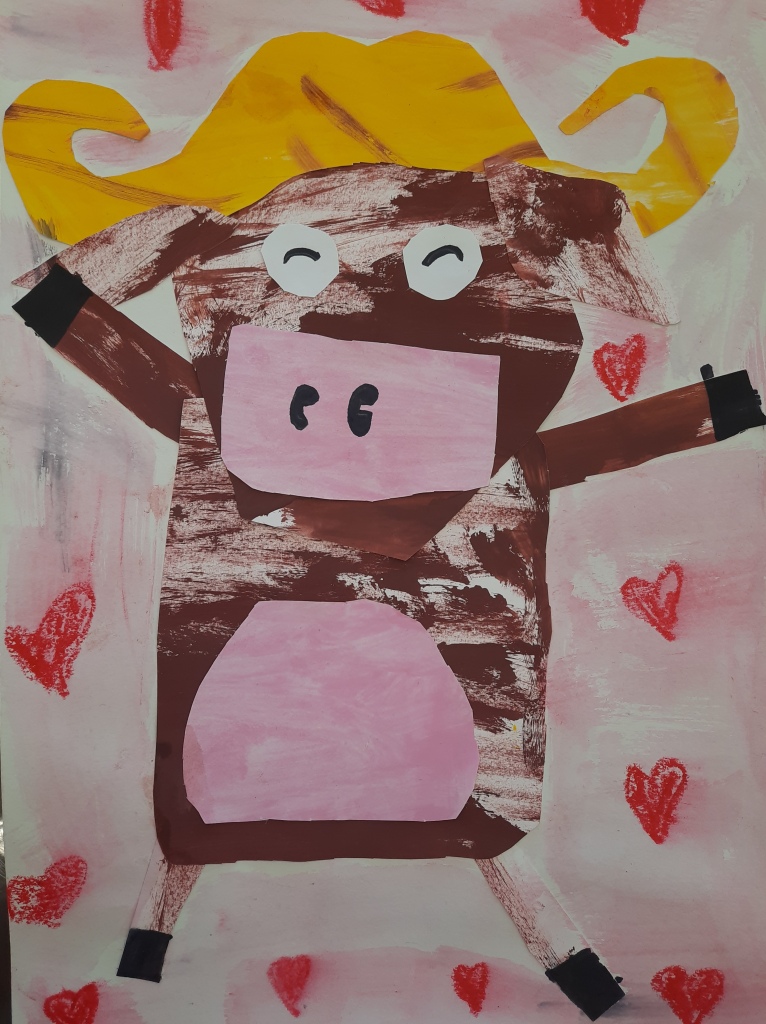
Grade 1 students love Eric Carle’s work and this project is a great way to introduce them to this collage style.
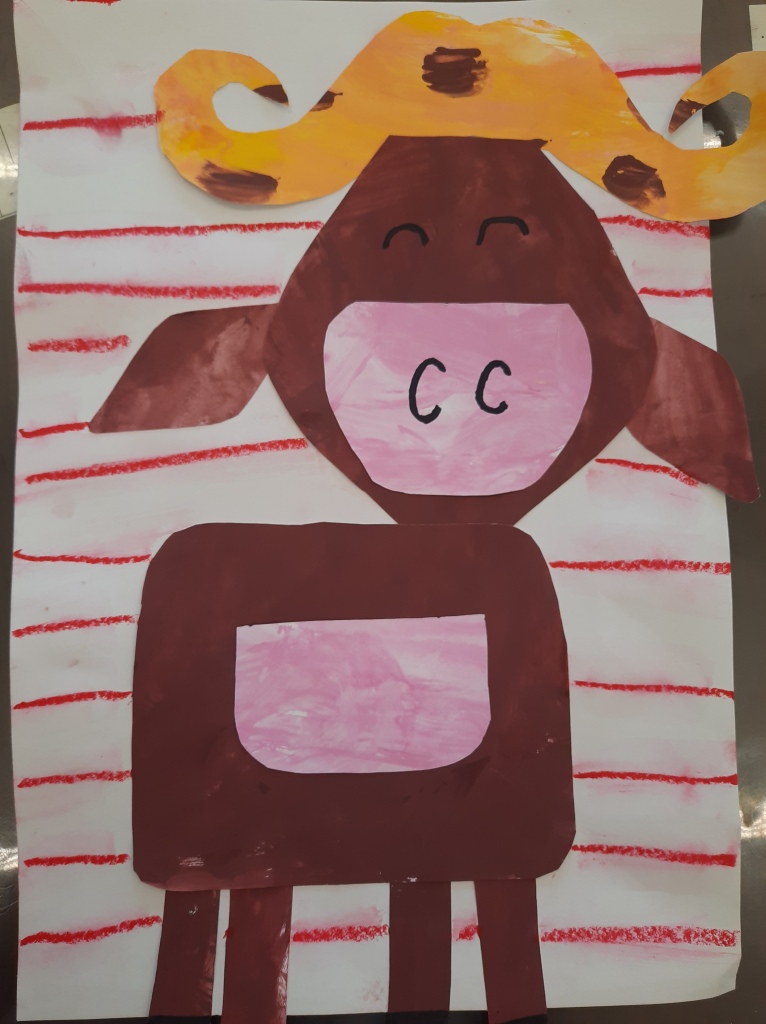
We first start by painting (roughly) white sheets of cardboard. Each student got 2 sheets and they were instructed to paint a whole sheet with brown and the other sheet was folded in half (long sides together), this created a middle line and we painted one half with pink and the other half with dark yellow. I told them we do not want the whole paper covered in paper, we want to see the brush strokes, some parts darker, some lighter, which is usually the way grade 1 kids anyways LOL.
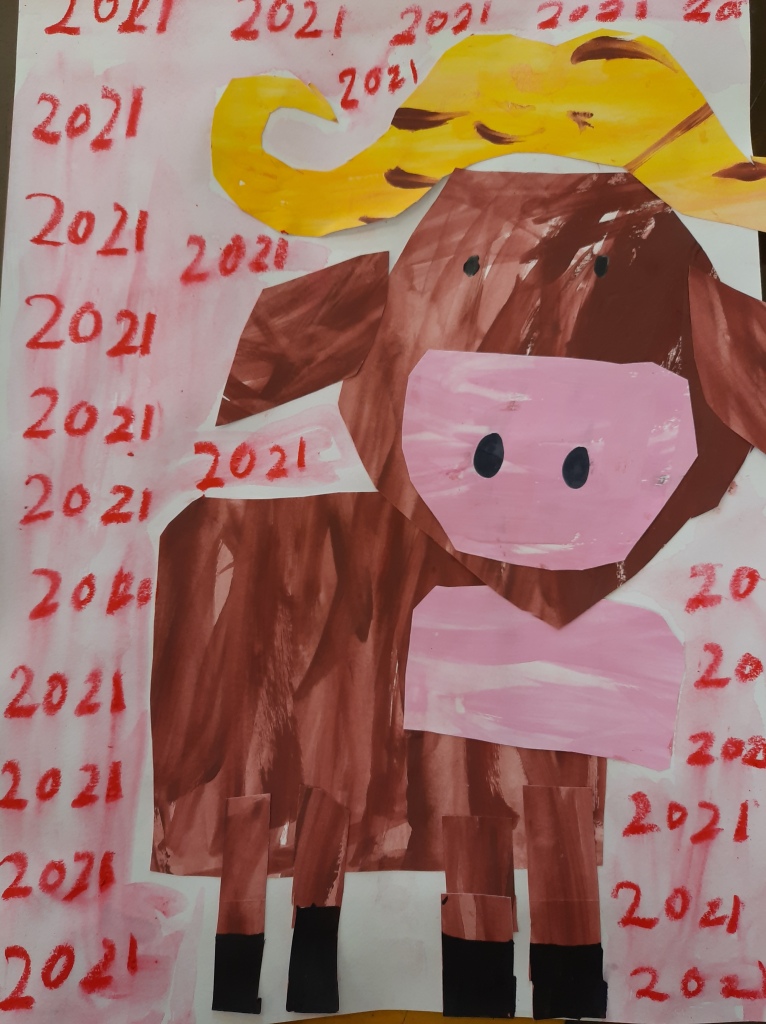
When the paper was dry, I prepared and handed stencils with the shape of a cute cartoon like bull. You can find the one I used here. We use lots of sheet notepads and the end is hard cardboard, the perfect thickness to make stencils. I usually collect all I use and also visit the Kindergarten classrooms and ask them to keep those for me.
Next class students used the stencils to trace the shape on the back of the painted paper, but there was a catch, the brown paper just fit them all and you had to play around (like a puzzle) to make them fit, so I asked them to use a pencil just in case they needed to erase, this turned into a great spacial thinking activity, some found it hard! We cut out once we were sure we had 9 pieces traced in total, and I collected them with paper clips. This brings me to explaining our color coded classroom:
I have 5 long tables, each table sits 5 students. We have a red table, a yellow, a green, a blue and a purple. The supplies caddies and containers match the colors, this helps to keep track of irresponsible students, as you can tell who did what or where did something go missing (purple table, you are missing a glue cap….oh there it is). Students also write on the back their table color, eg. Ms. Adriana RED, and so, when the artwork is dry, I group together with a colored paper clip, and I end up with 5 grouped piles of paper, and before the class shows up, I put the red clip pile on the red table and so on. It takes me less than a minute. For this particular activity I needed 5 colored clips per table, but it worked perfectly well and each student got their own set of cut out pieces of paper.
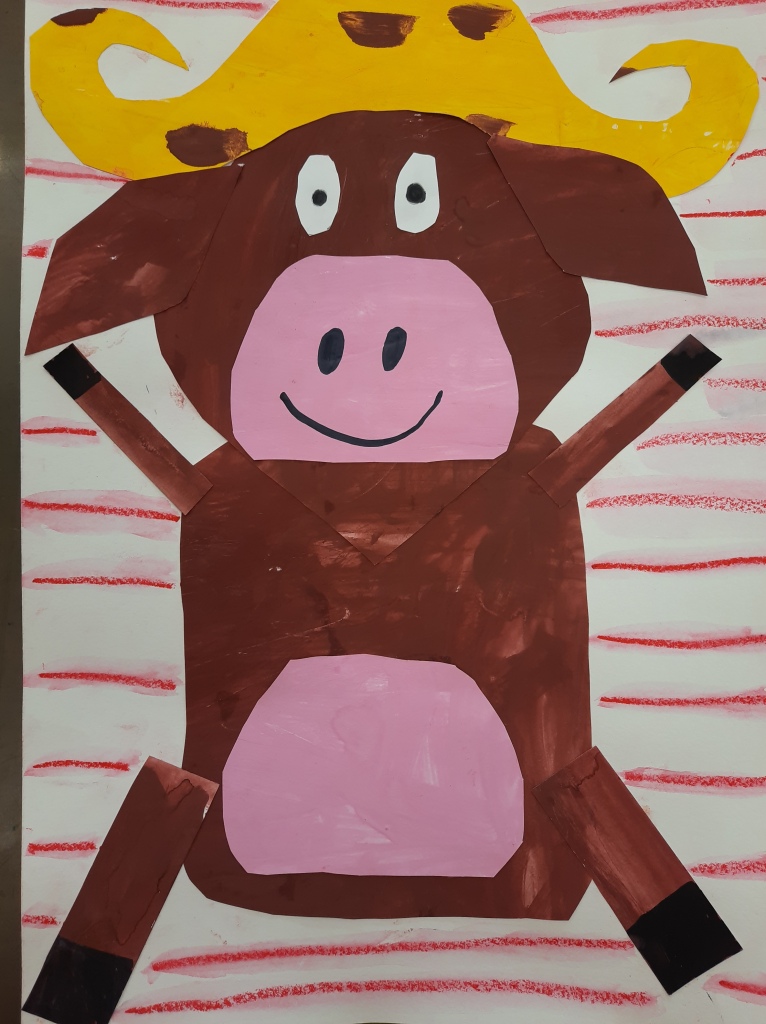
I then handed a larger piece of cardboard, use any size slightly bigger than the bull itself. I modeled how to assemble the pieces, but there was some freedom, as the pieces could be assembled to make the bull standing in all fours or in two legs and arms, it could also be profile or a side view; most important thing was to make sure it was glued properly, I always emphasize I do not want pieces of paper “flapping” , we need the right amount of glue on the sides and all around and a bit in the middle, we also need to press and count to 10 before letting go. Once all was done and it looked like one piece of paper, they could put in the drying racks.
Next class I had on the board different sets of eyes and handed small pieces of white cardboard and black markers. They could choose the eyes they liked, if it had a white part, they needed to cut out two ovals before adding the pupils with a black marker. Simple eyes could be traced directly on top without adding white paper. The nostrils were traced directly on top of the snout. They also added hooves using the same black marker, once finished and that same class, I asked them to clean their space and come to the front table to add a background. I had red water soluble crayons, brushes and water. They could add any pattern around (samples were on the board, but they could do any pattern / motif they liked) with the red crayon, and then spread some water on top with the brushes, which gave a nice effect and made it look finished up properly.
This lesson plan can be adapted to any grade level and it is fantastic a fantastic way to exercise focus and spatial thinking skills.
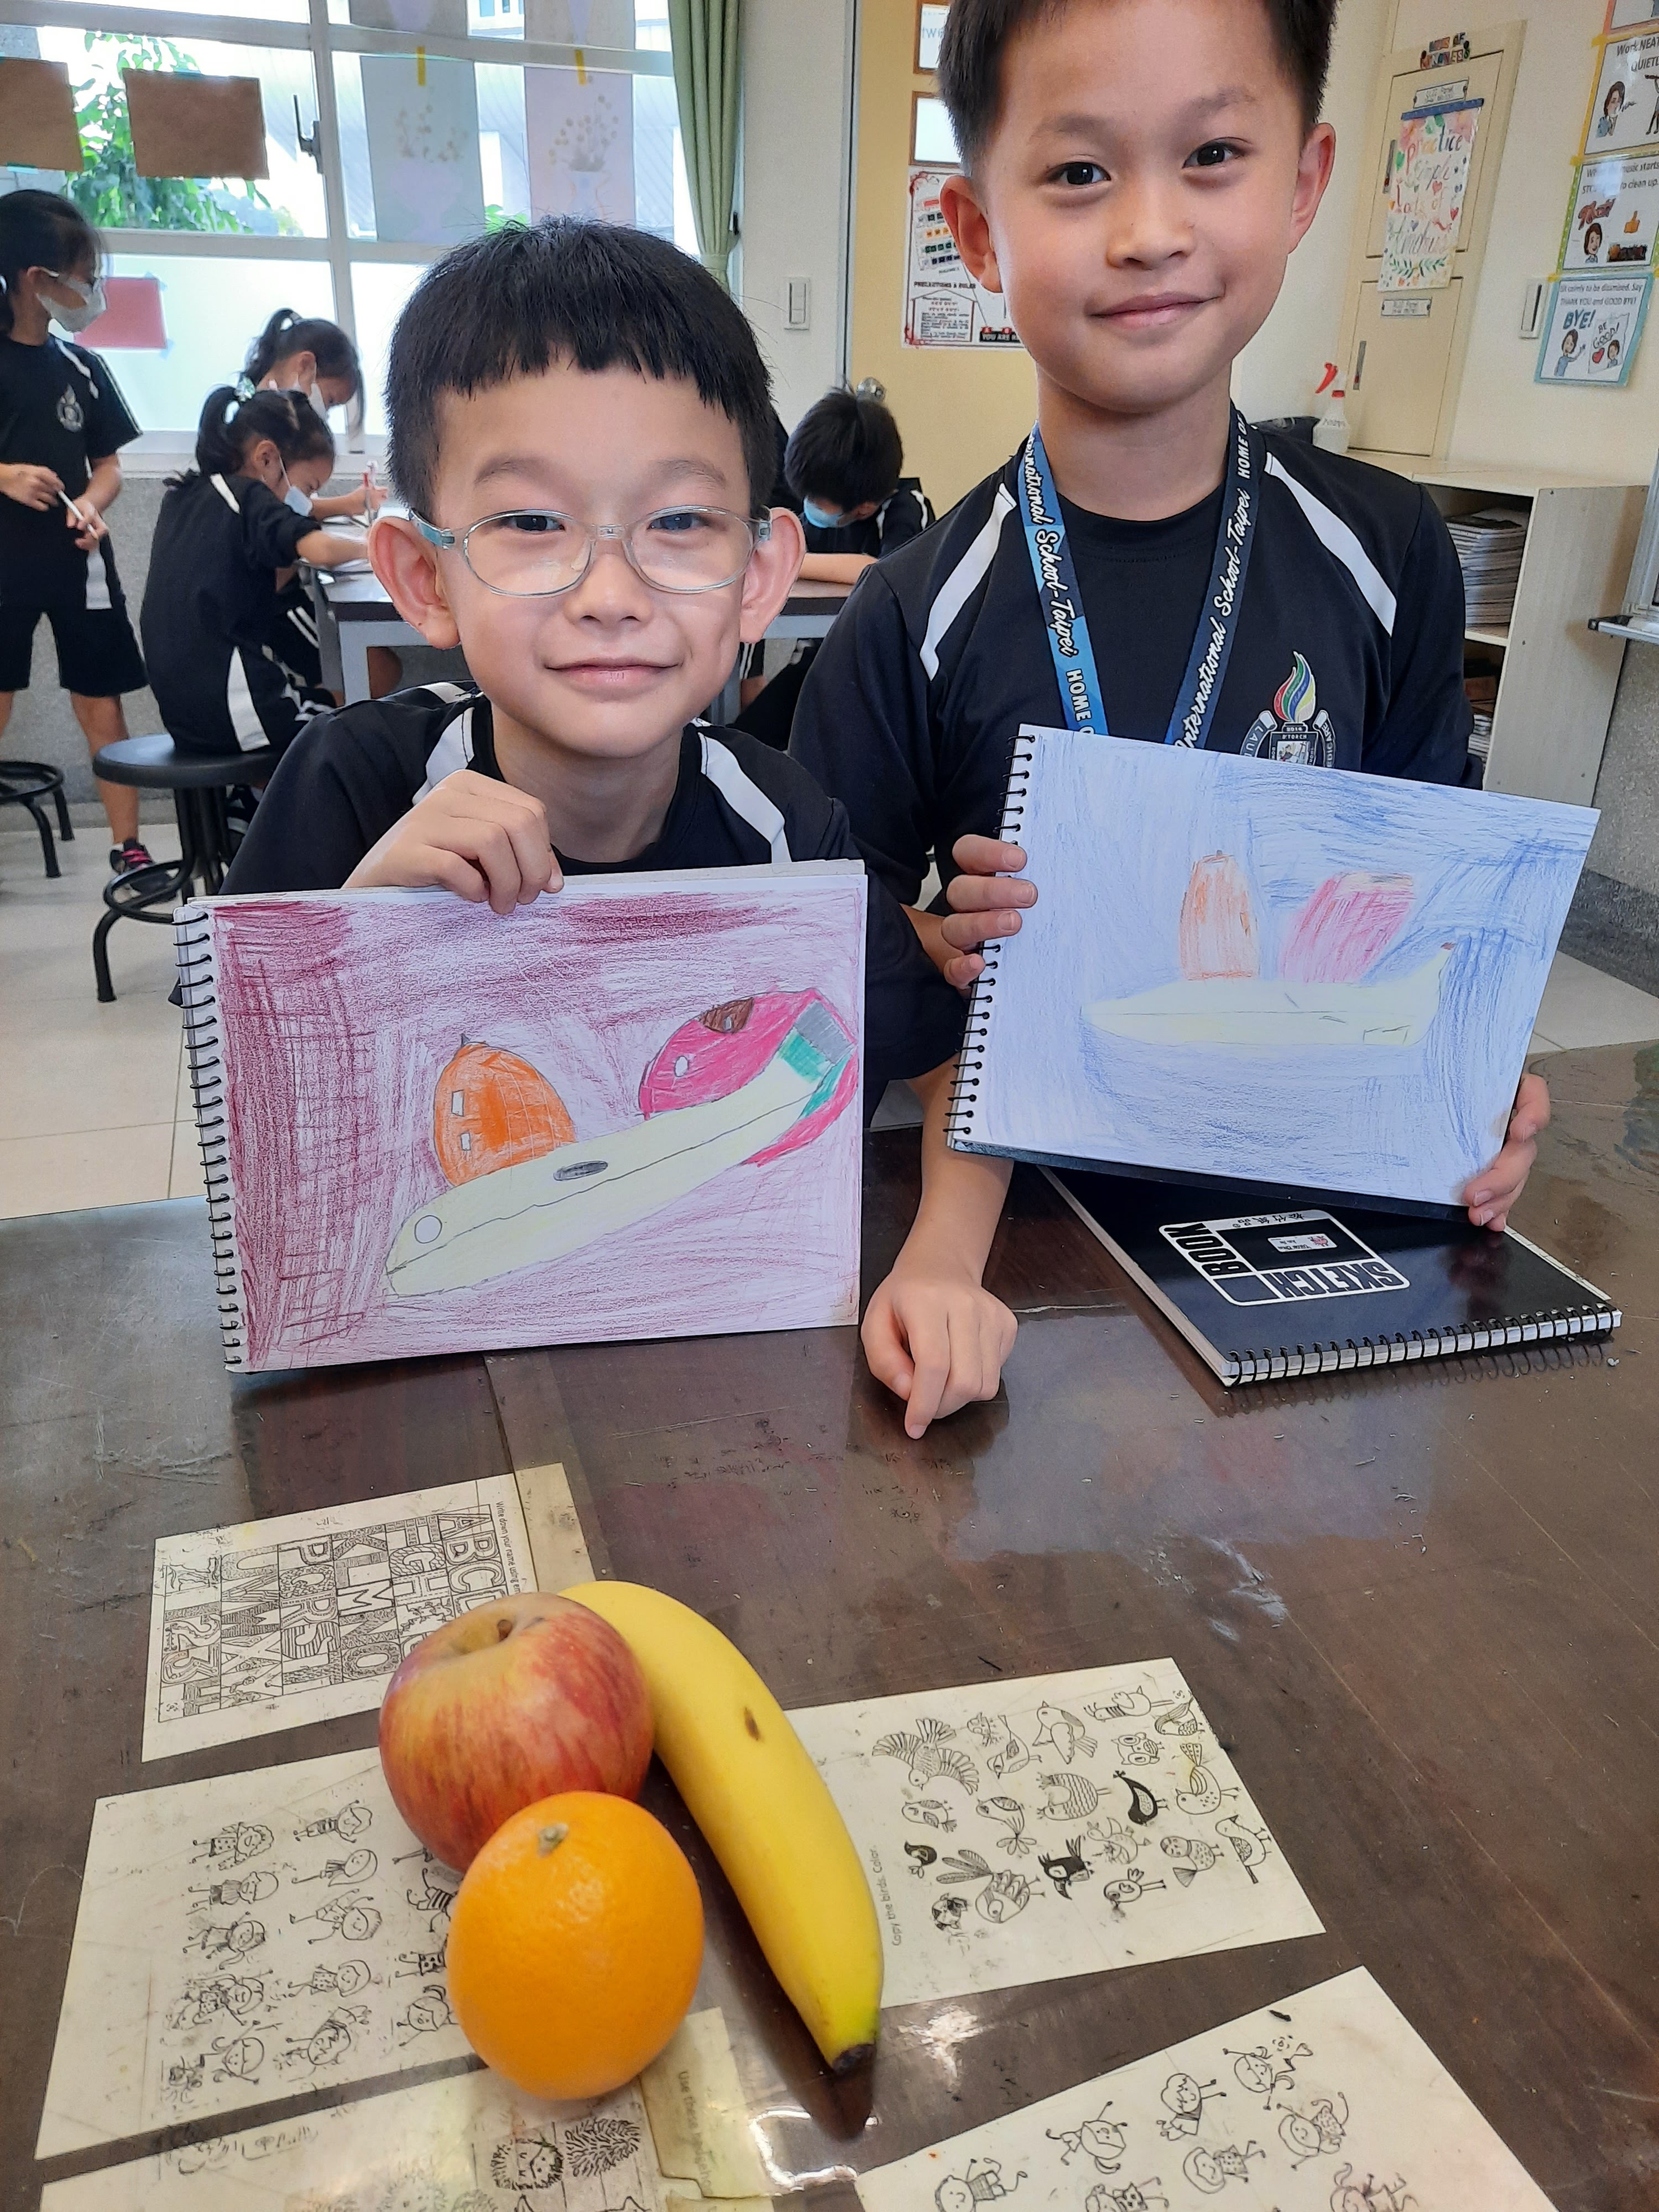
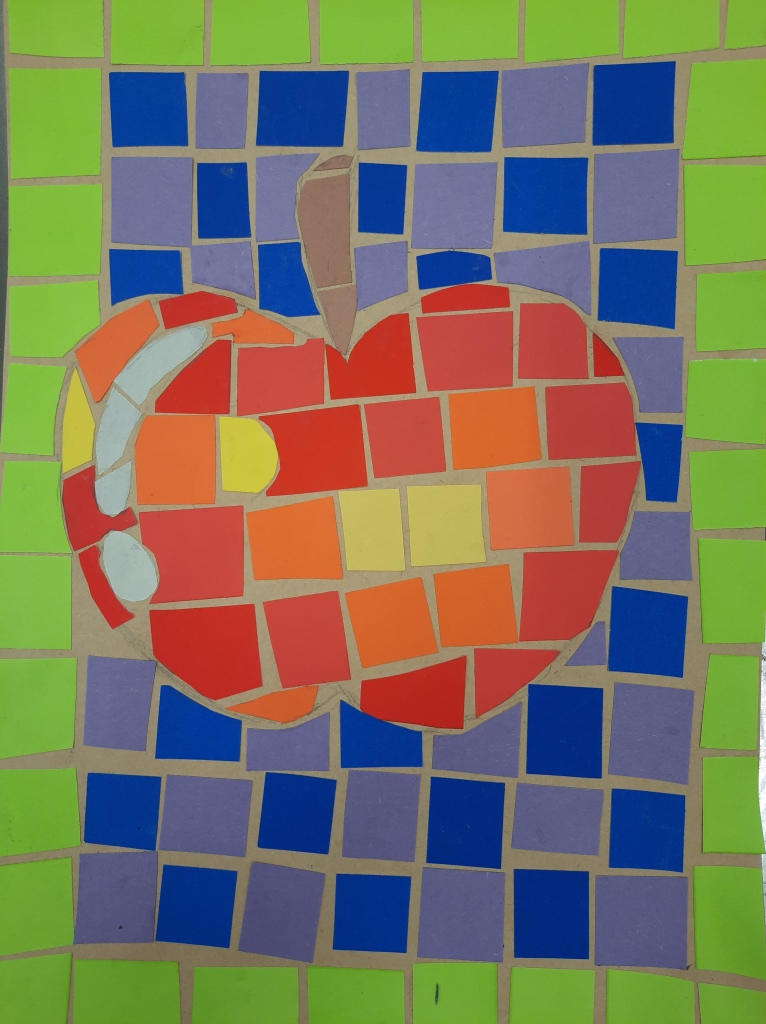
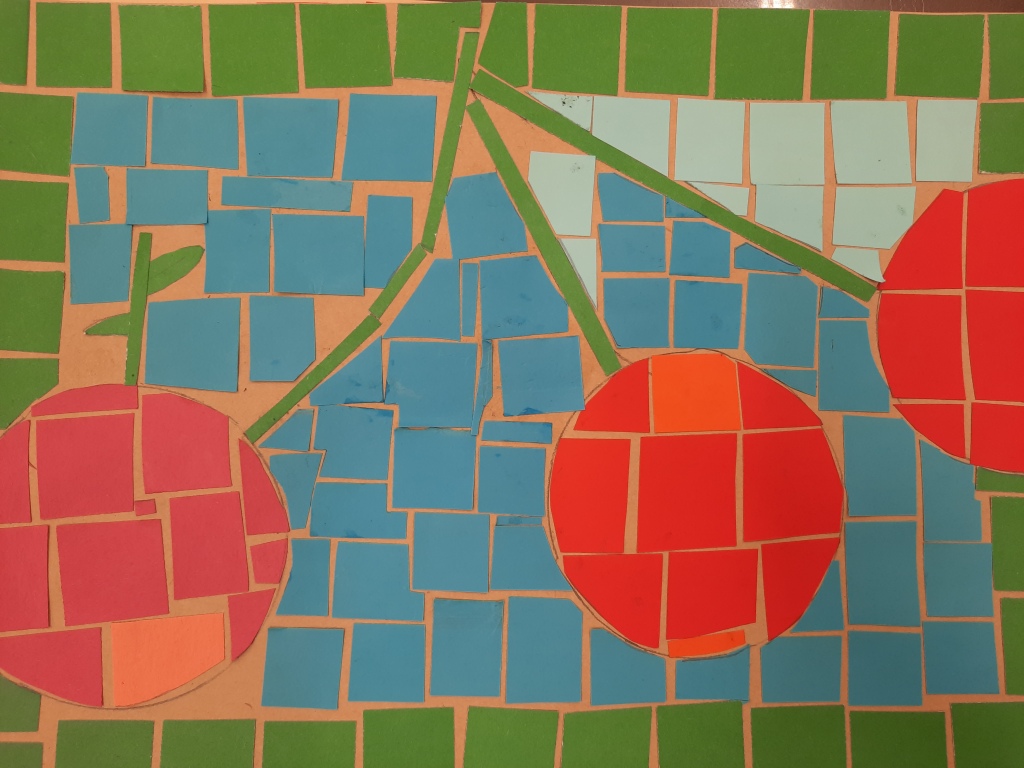
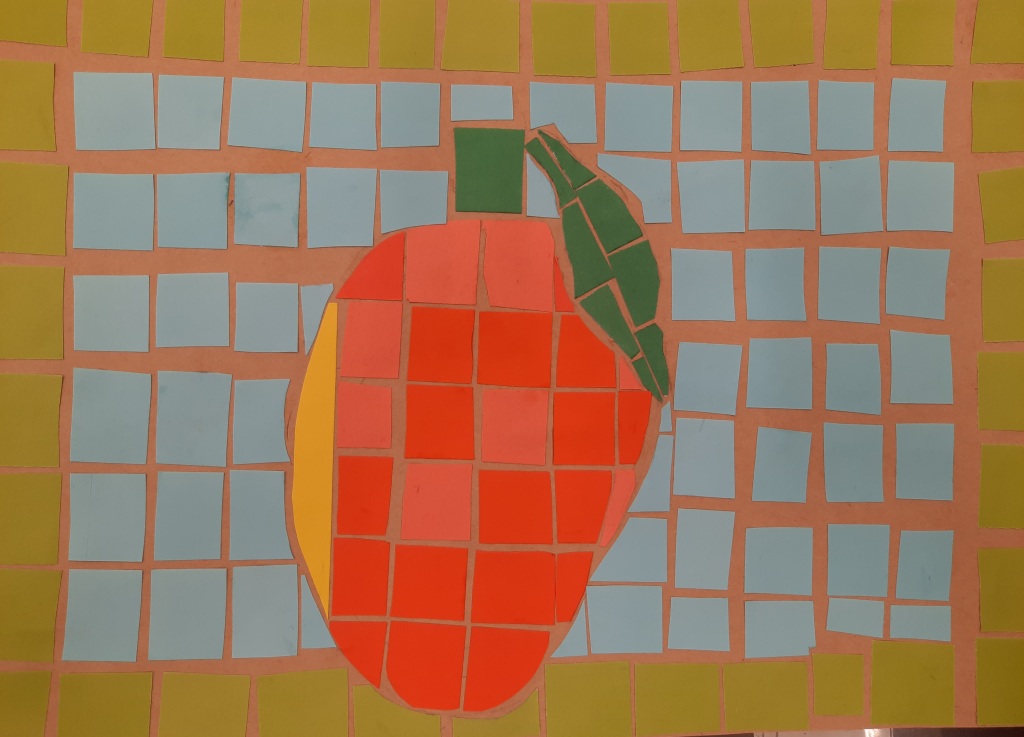
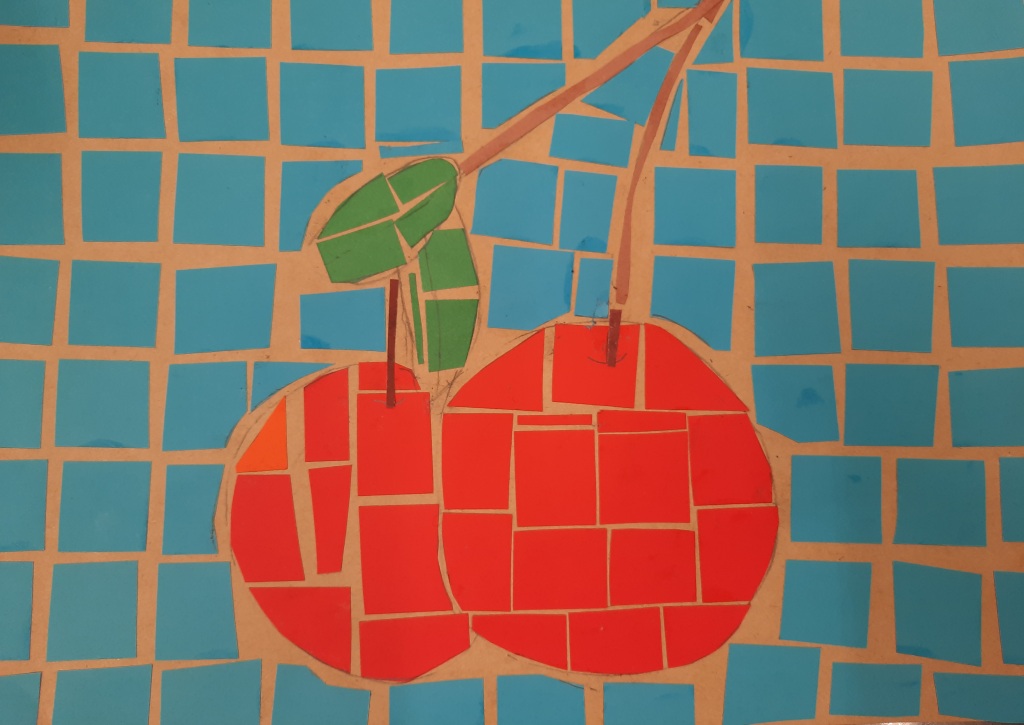
Sketching with real fruit helps students to pay attention to detail and enhances observational skills
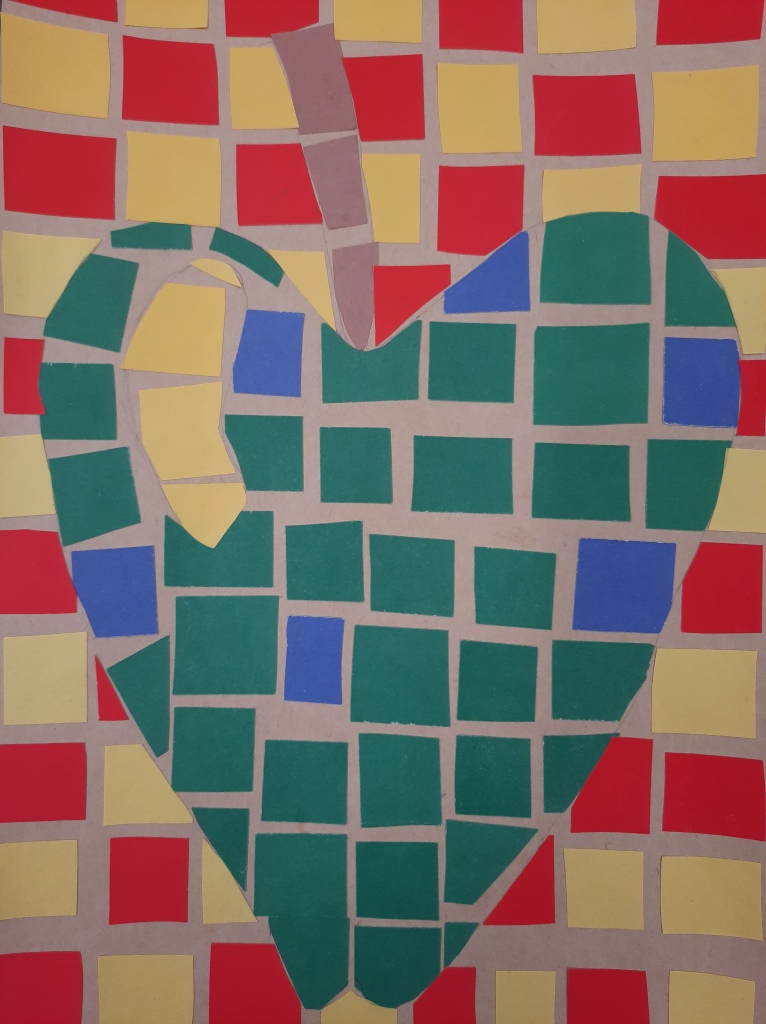
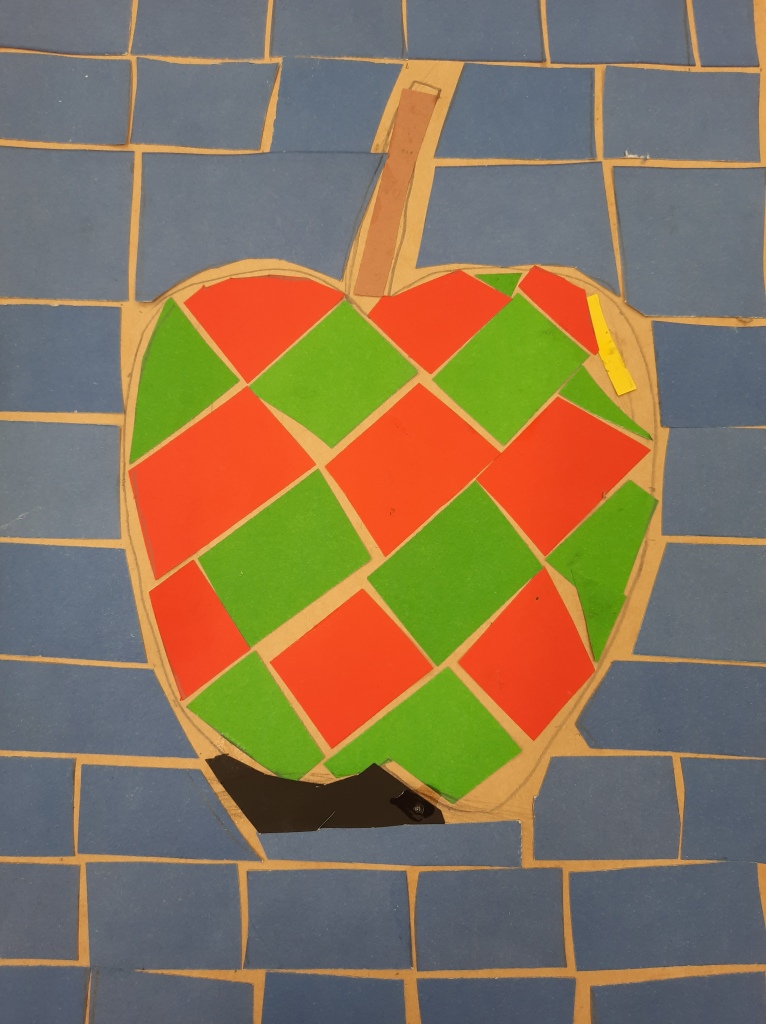
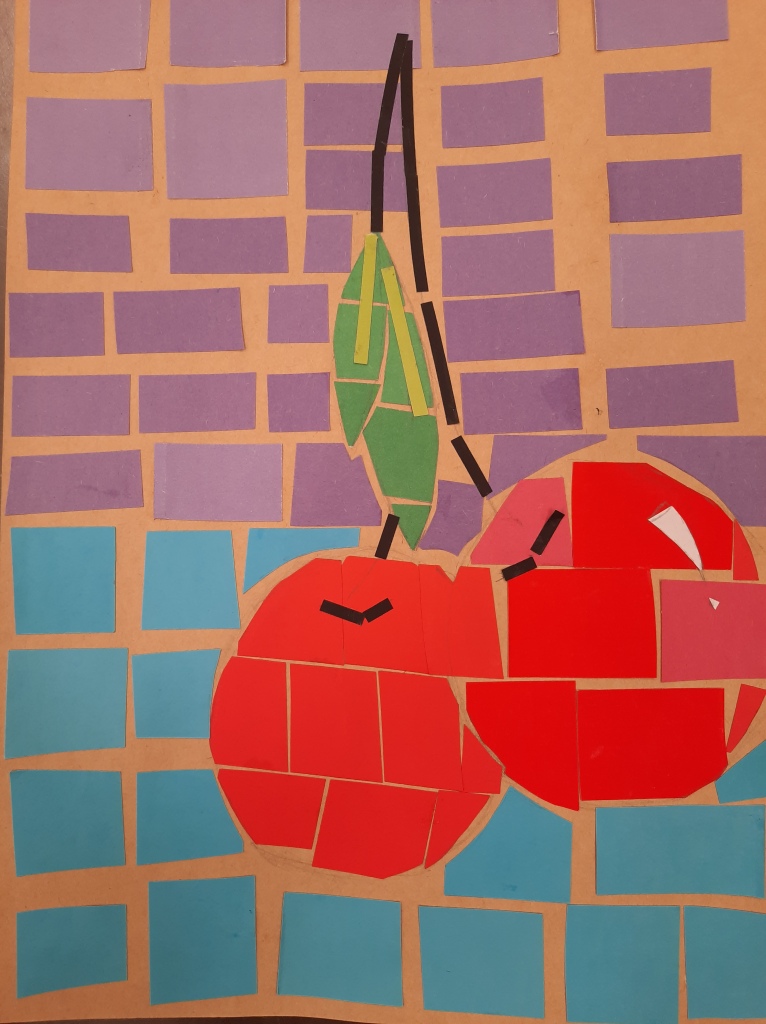
One class I brought real fruit for the students to sketch. I asked to take not on the imperfections and light as they drew, once outlined they colored with coloring pencils; this step is not needed to make a mosaic but I like to do projects focusing on different angles. Next class we outlined a fruit, could be the one we choose last class or another one; I asked them to make the fruit filling most of the paper in this case it was a A4 sized cardboard. Once all of the students have their fruit outlined, I explained the basics of mosaics, basically we work with squares the whole time until we come into a space where the square does not fit, in that space, we use a pencil to trace where exactly should we cut the paper to make it fit, then cut and stick. When the fruit was done, I asked them to use a contrasting color for the background and continue filling the space in the same manner.
This activity, be warned, demands a substantial amount of patience, which makes it a great activity for the students, have you noticed the more screen time, the less patience they have?
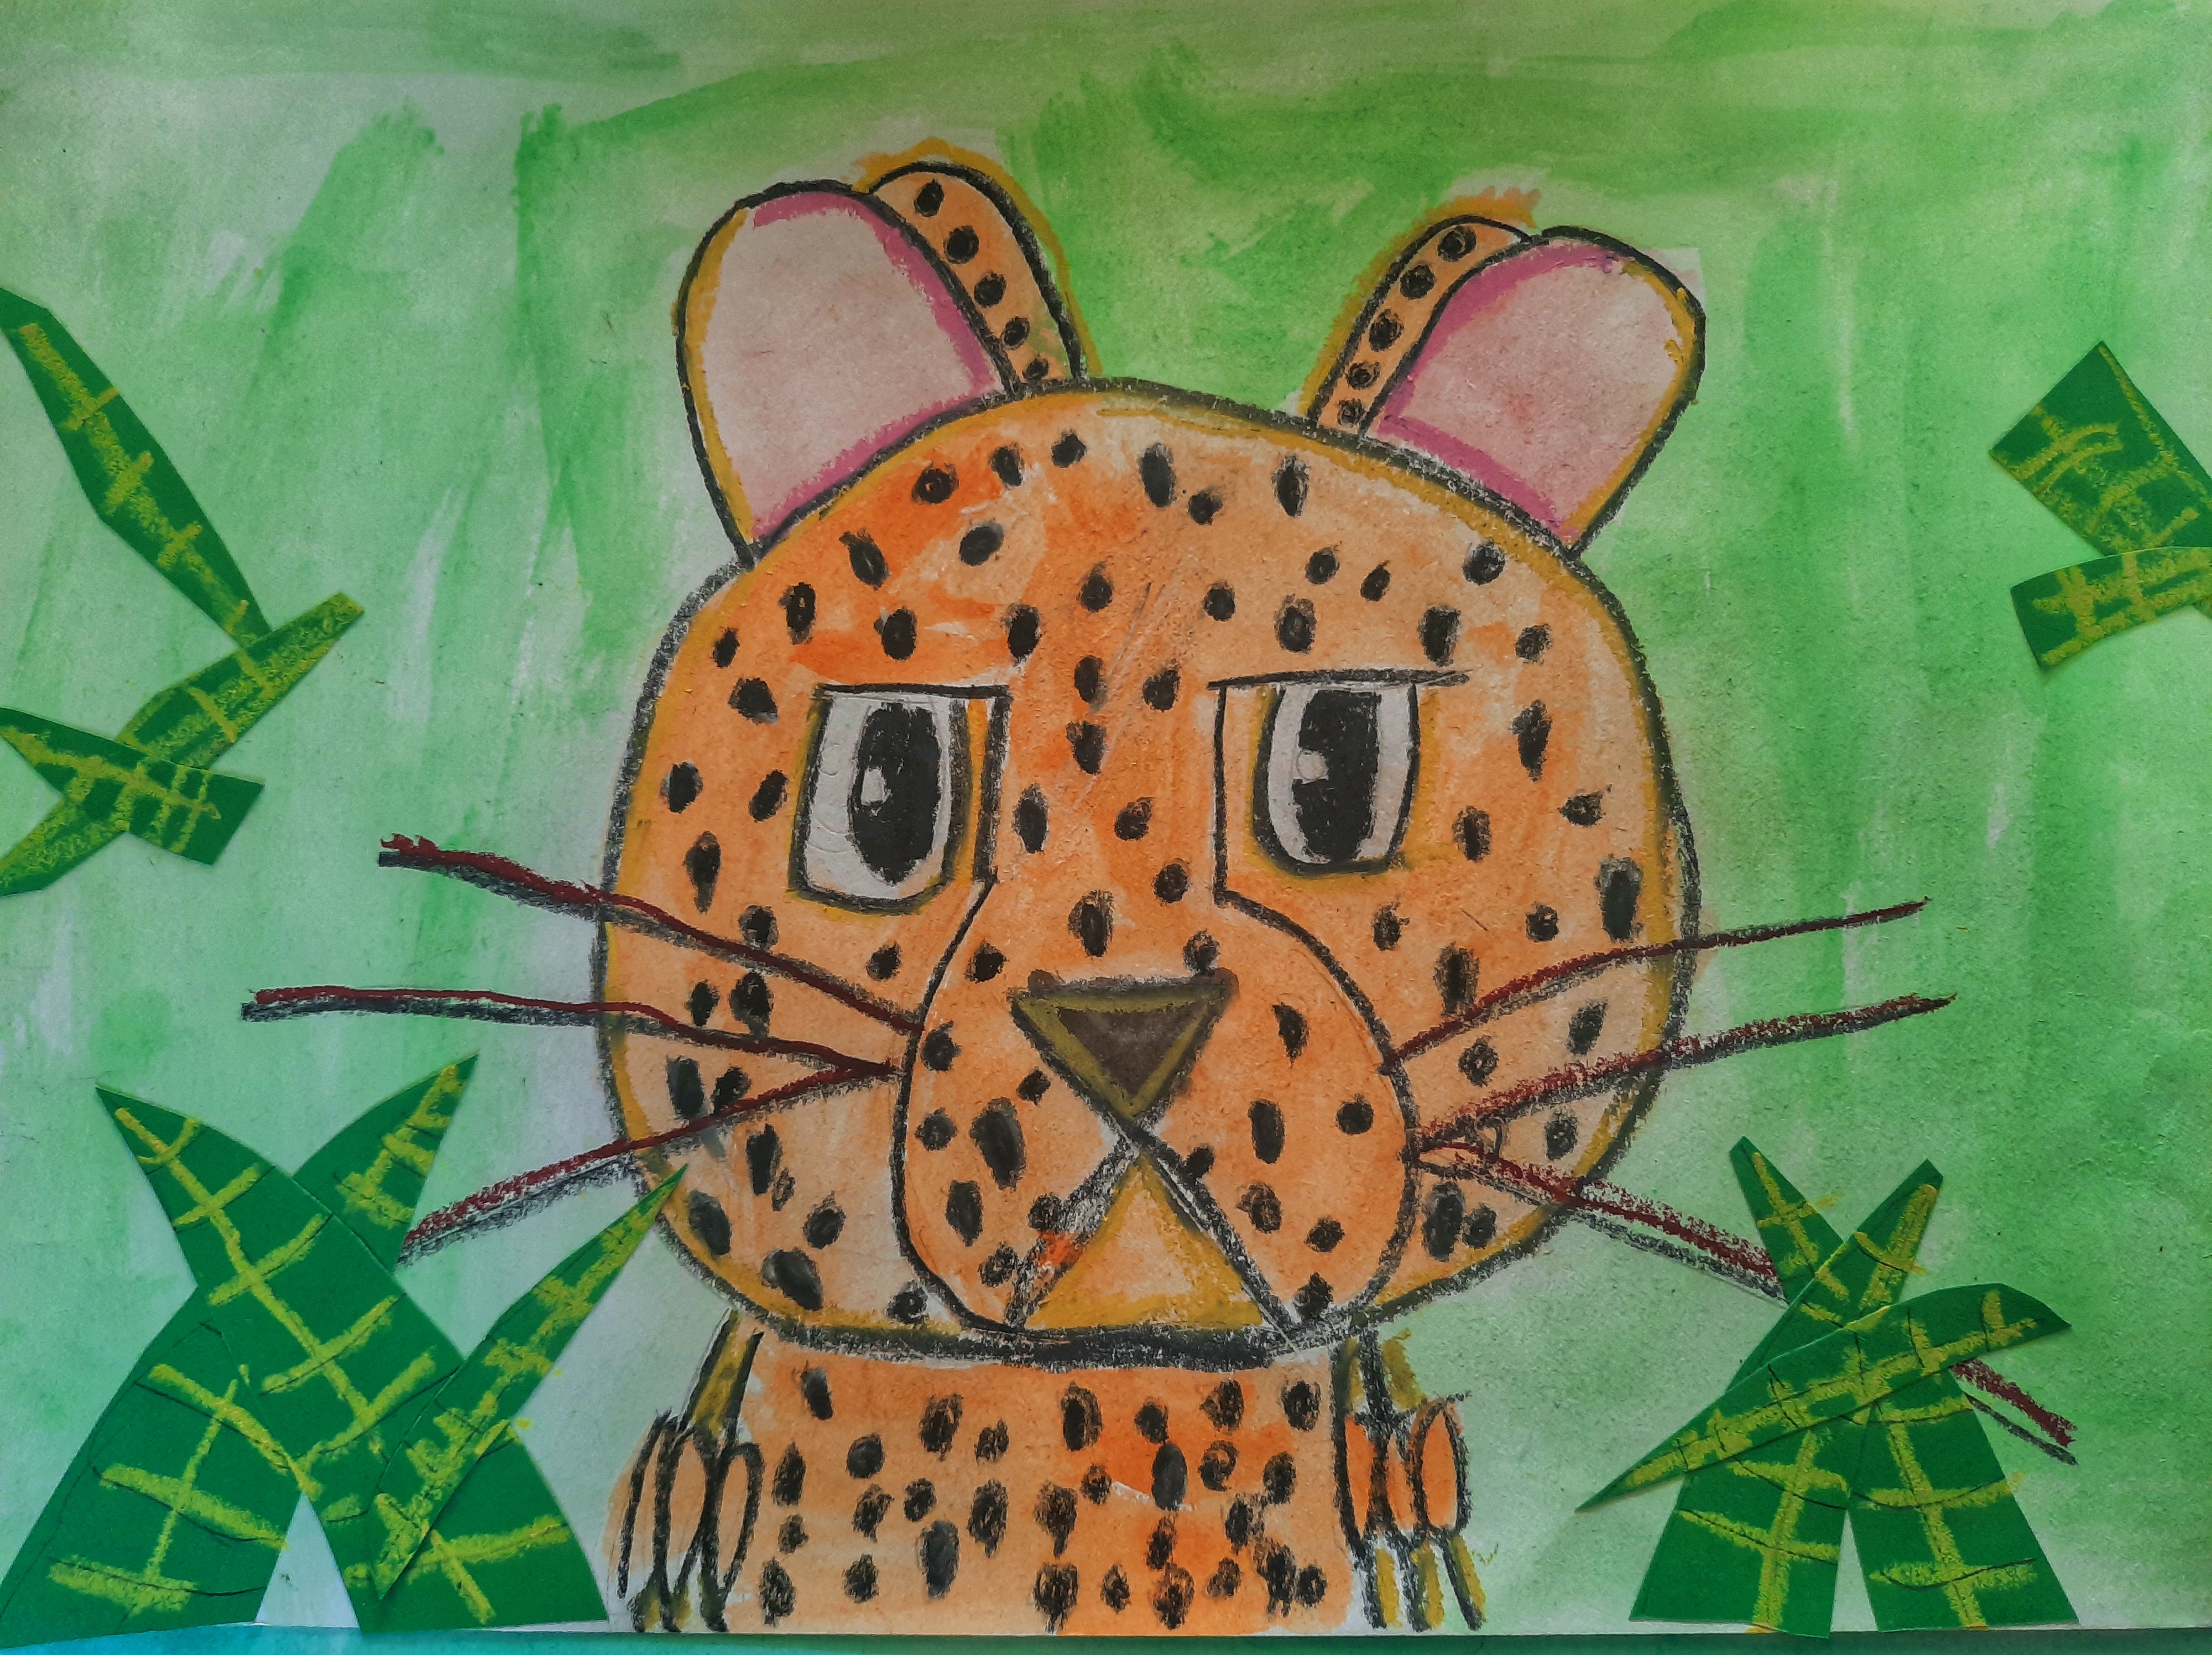
Students got a lesson about big cats, some of its distinctive characteristics and fun facts. Then they choose one to sketch (lion, cheetah, puma, panther, tiger, lynx) and I directed the sketch to grade 3 students. Older classes can make their own sketches using real pictures. Using visual finders (lesson here) gives unique results.
Once they were happy with their sketches, they outlined using a black crayon (stripes, rosettes, spots and eyes were outlined and colored with the crayon too). They then proceeded to watercolor. Once the paint was dry, they cut out some leafs (flowers and even fruit) to add to the paintings, and finally they added shades and detail using oil pastels to enhance both their animals and the leafs. Emphasize the use of lighter and darker colors for this. We used dark brown and black where we needed some shading, and white and light yellow where we wanted to add light.
While working on this lesson, we talked lots about the needs of wild cats, their habitat and endangered animals, we talked about what we can do to keep them safe or contribute somehow to their well being. Using less plastics, not wasting food and planting more trees were common comments between grade 3 students.
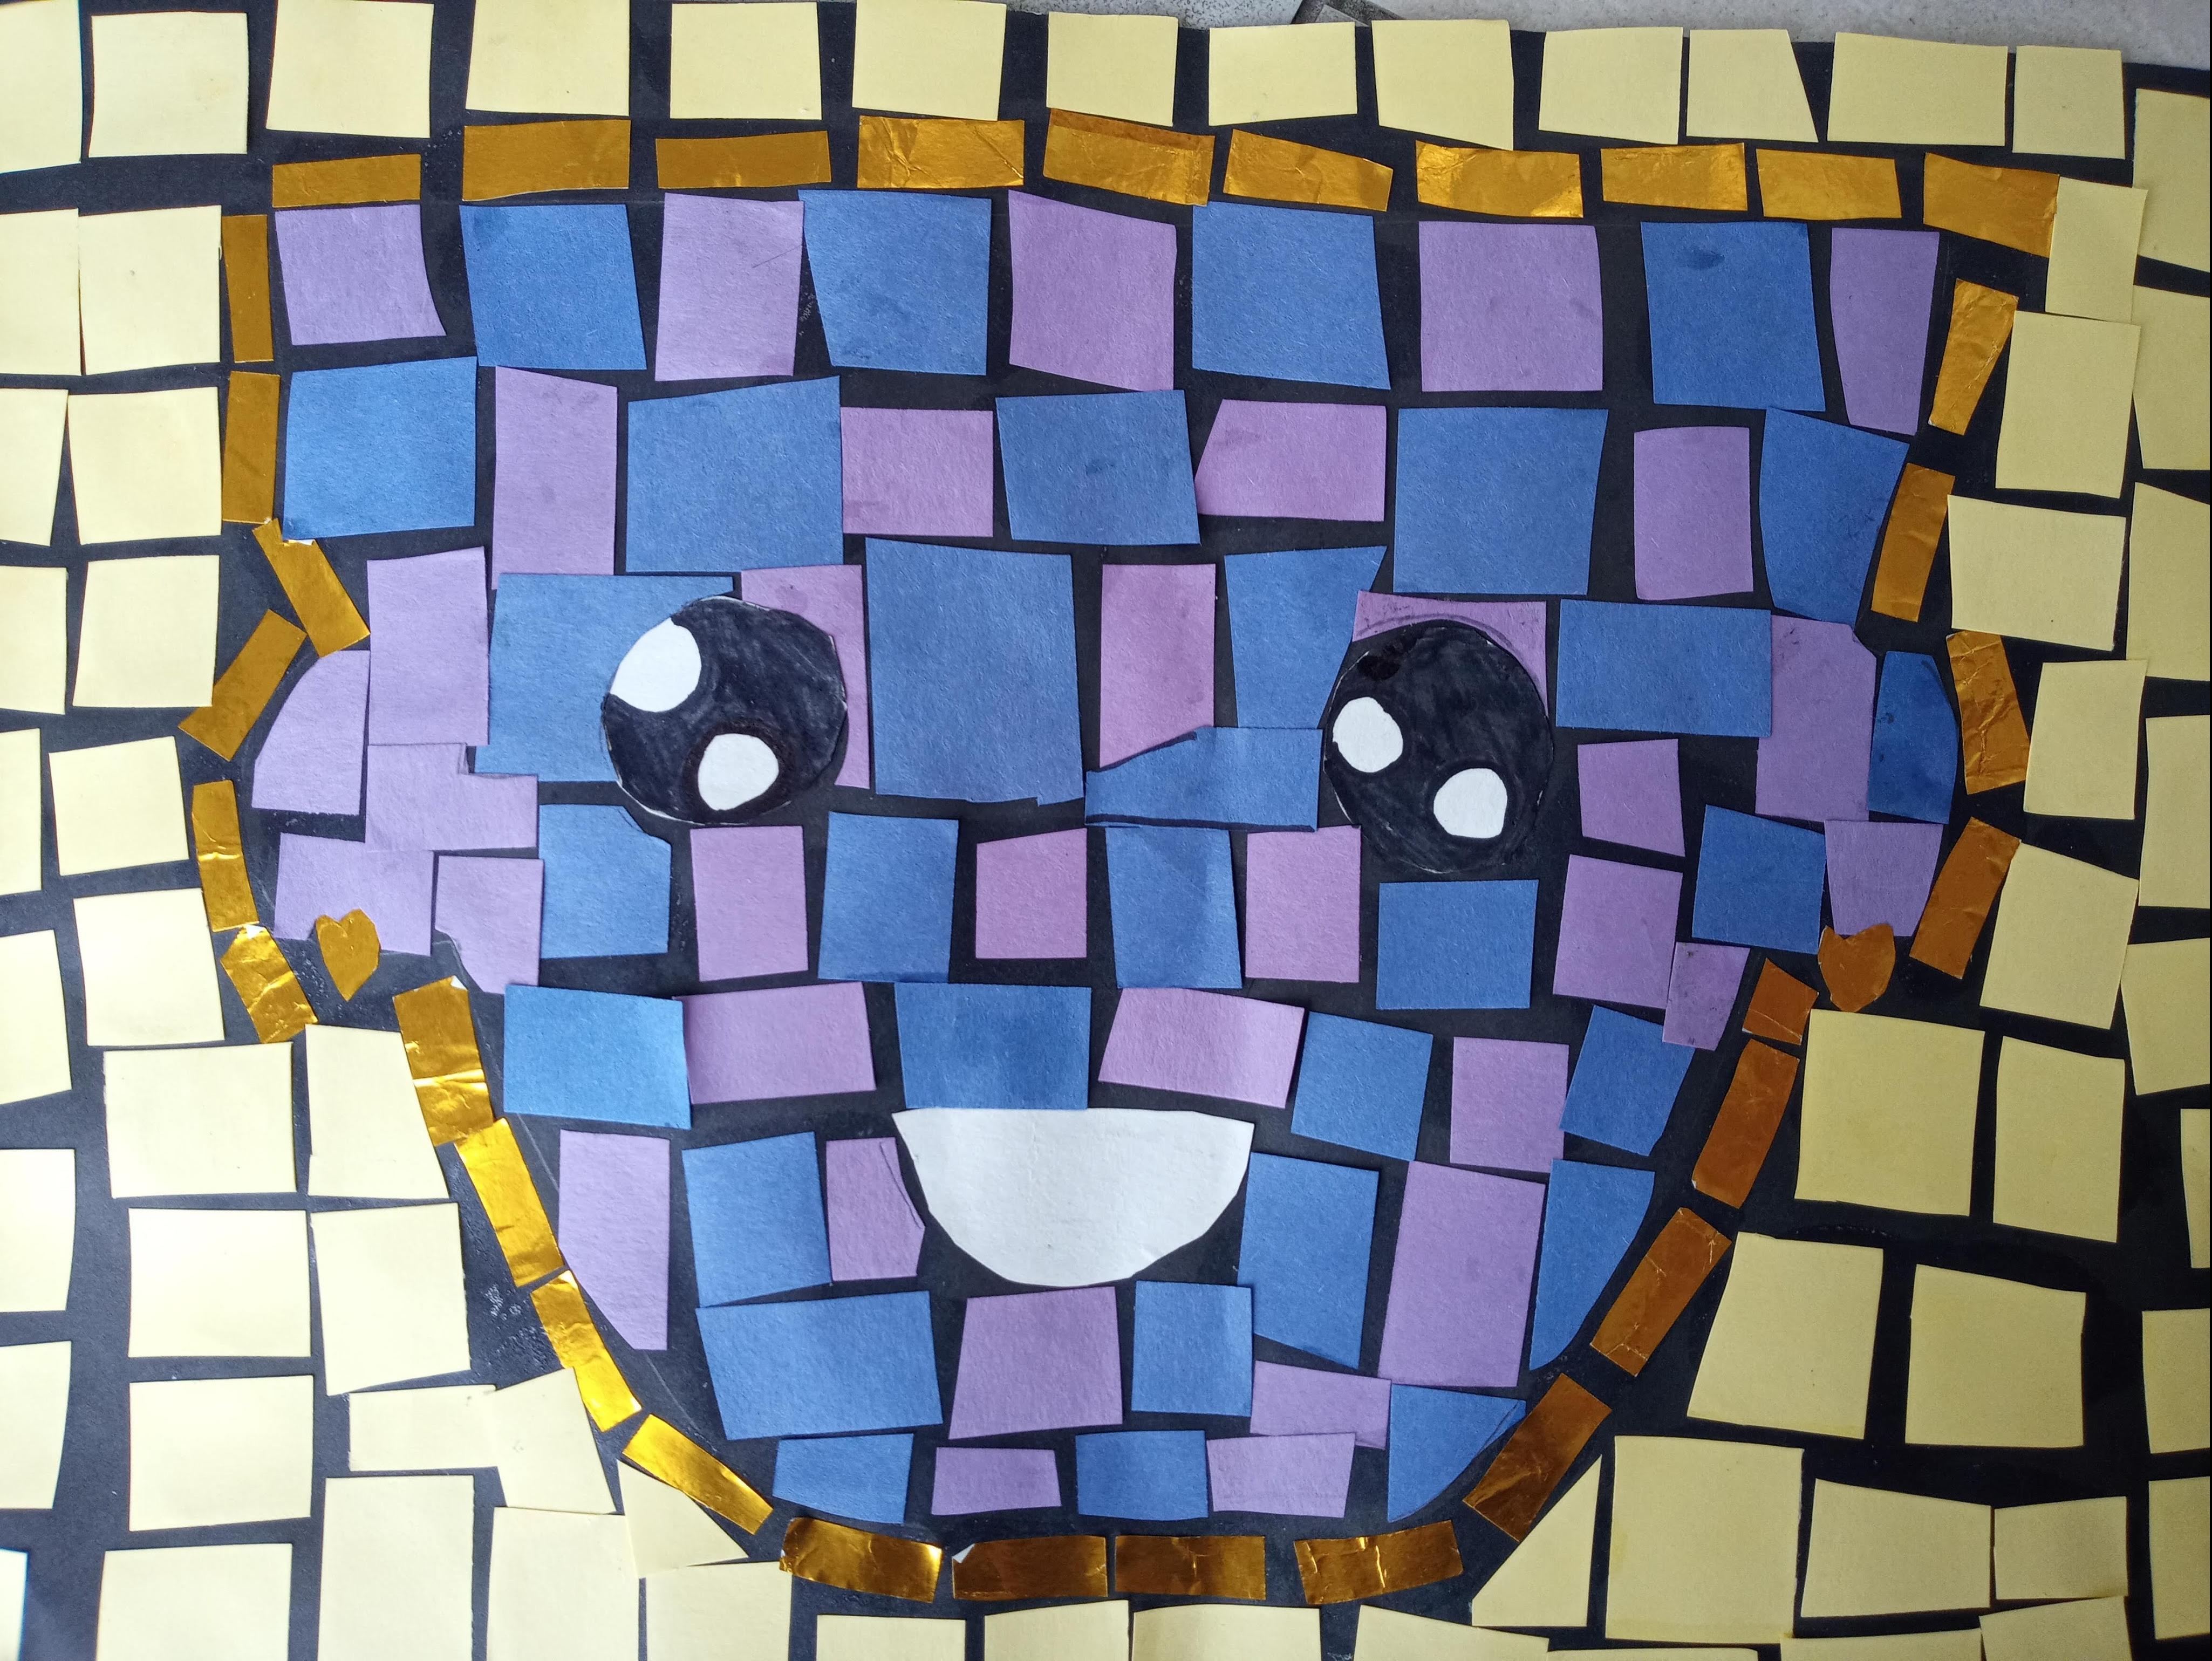
This was part of our Ancient Civilizations unit, we talked about the Aztecs, and after learning some interesting facts, students used a stencil to trace the outline of a mask (made with cardboard) They then added eyes, nose and a mouth, making sure the details were big and simple enough, as cutting shapes around can be challenging for younger students, add more challenges and a more sophisticated design for older students.
I demonstrated how to use a pencil to mark where to cut the paper when we need to “fit inside” a space. Such as around the eyes. Just place the paper on top and trace around with a pencil, then cut. You can see the pencil mark left behind around the right eye of the pictured mask, telling me this girl was actually listening to me! Once they got the basics, we were ready to start and I handed cardboard paper in different colors cut out in long strips (omit this step for older students), as well as squares of white cardboard and asked them to design and cut out the facial features first, then work their way using only squares of colored paper to fill in the rest of the space. They also outlined the mask using thinner lines (rectangles). I handed some sheets of gold shiny paper that they could use for whatever they decided and they got very excited about it, if you can find inexpensive shiny paper, it will make your students very interested on the project. Some used it to make earrings, crowns, and some used to outline their mask (as the case of this Grade 2 student).
This looks more simple than it really is, specially for younger students, it demands patience and focus. Interestingly, this tells a lot of the mathematical skills each student has, and is a great practice for spacial thinking skills.
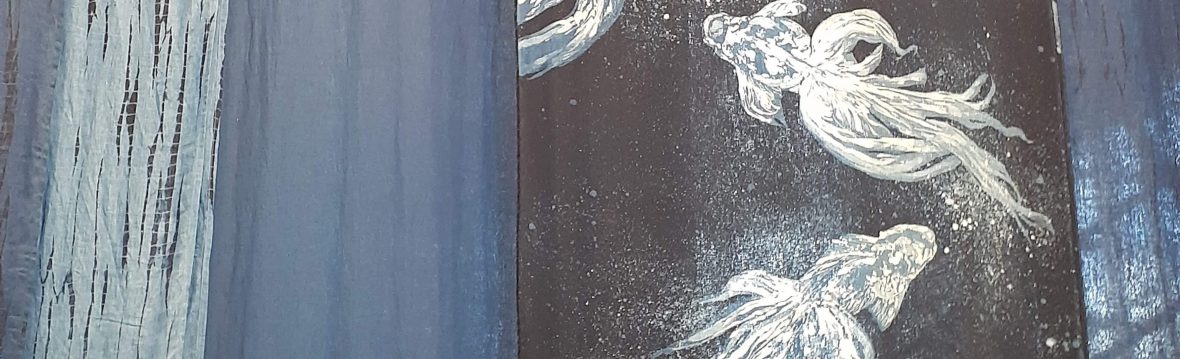
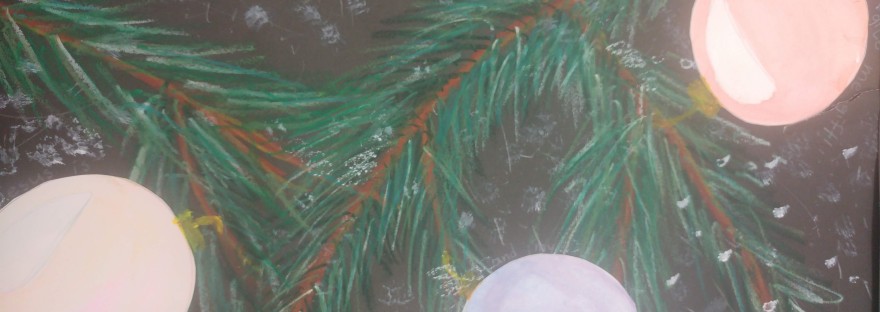
This was a simple quick project that involved watercolor and oil pastels. We did wax resist to bring light to the ornaments.
We started by making 3 or 4 circles, adding a white curved line in a corner using a white oil pastel (remind students they wont see it until they water color on top). That mark will be the light reflection on the ornament. Students can then watercolor the circles as they like. I asked them to mix 2 colors and blend them in, just for the sake of practicing this technique.
Afterwards I projected pictures of pine leaves on the smart board. I asked them to notice the shape and the texture and to try and make some branches in a black piece of cardboard. I asked them to use at least 3 shades of green on each branch, to add deepness and enhance texture.
Once that was done and there were enough branches on their paper, they cut out the (dried out) ornaments and glued them into the branches. I then asked them to write around the ornaments what did Christmas mean to them. We wrote with small letters using white colored pencils. Words such as family, presents, special dinner were seen around their ornaments. Last but not least they splashed a bit of white acrylic paint on top and gave it a snowy touch.
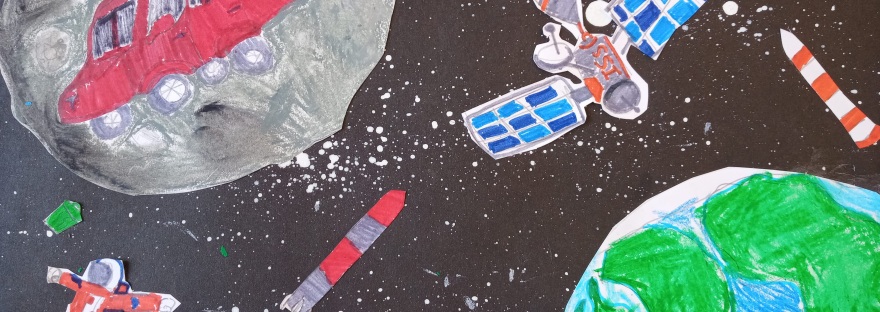
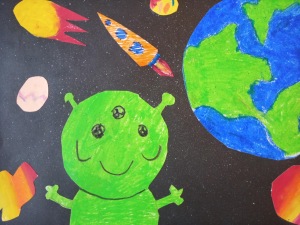
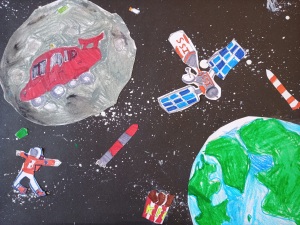
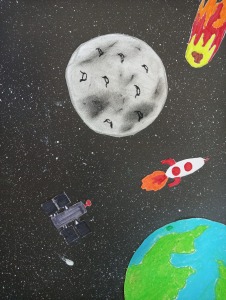
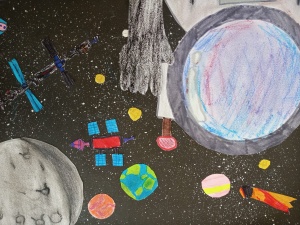
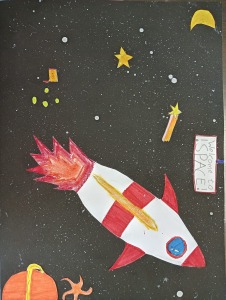
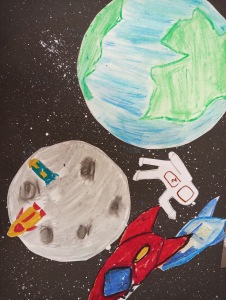
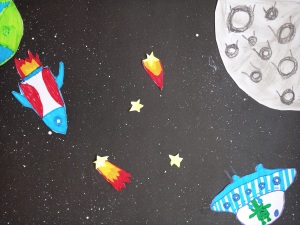
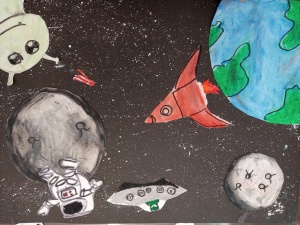
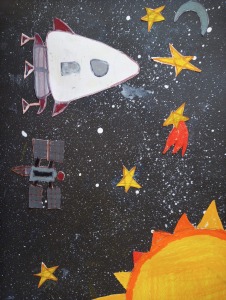
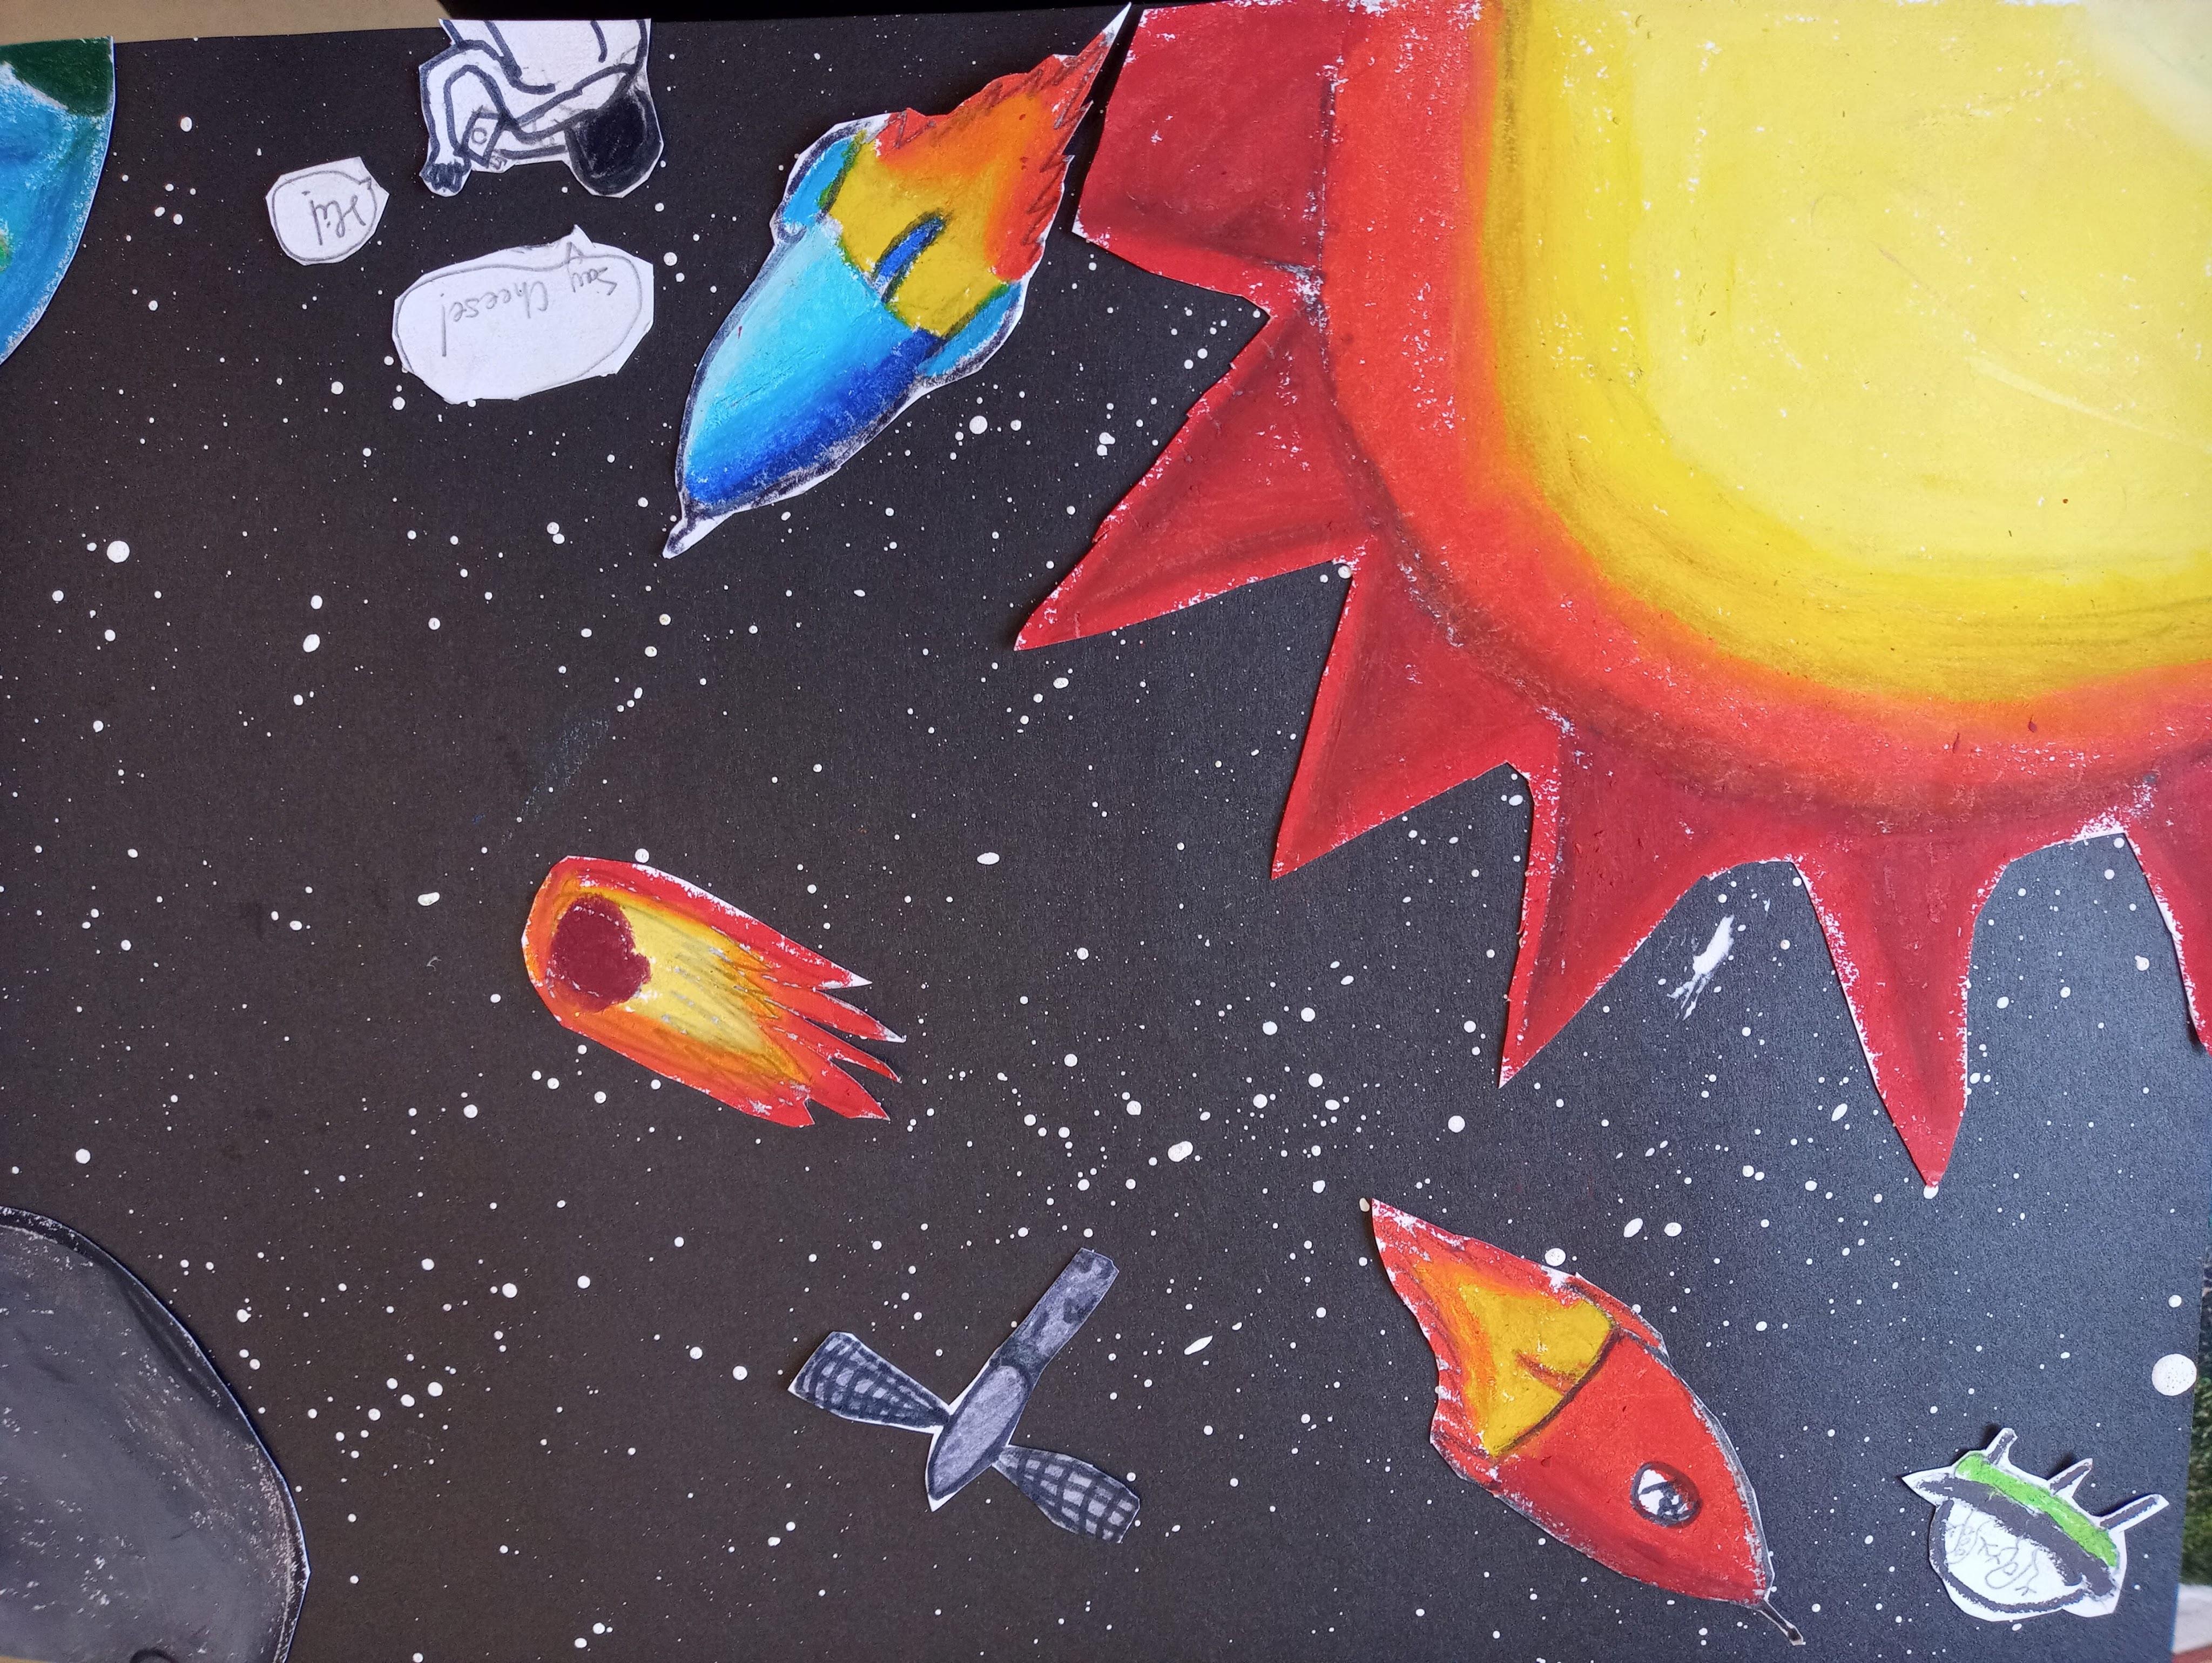
This project was the perfect example of forcing myself out of my comfort zone for good. I am just not into space stuff AT ALL. I asked grade 3 kids if they would like to try out space stuff art and they got excited! And in the end I think it was grade 3’s most popular project. I linked this to both social studies and science, as their classes were into the phases of the moon and modern day inventions (satellites).
We started out by sketching different objects we wanted in our spacescapes. They needed a moon in any phase they preferred, and they needed one extra large object, one or two medium sized objects and as many smaller ones as they could fit. We sketched the shapes in A4 cardboard, and the extra large object needed to be as big as they could fit. Some students used 2 sheets for everything, some 3. I always emphasize that they sketch lightly and that they identify basic shapes inside the objects they are trying to sketch. I handed printed out images of planets, the moon, moon vehicles, spaceships, people wearing space suits, satellites, meteorites and more. Once students sketched what they wanted in their spacescapes, they proceeded to outline and color using oil pastels (for bigger shapes) and markers (for more detailed, smaller objects). I explained how to blend in pastels, to start with the medium color and then enhance with lighter and darker shades. The moons turned particularly cool using this technique, we started coloring roughly with gray then adding texture with darker gray and black and some white. We also splashed white acrylic paint on black cardboard, to make our galaxies. Once all the objects were nicely colored, we cut out the shapes and arranged in the dried up galaxies. I reminded students to play a bit with composition, and to place some objects in the corners and then cutting them out (you don’t want all of the shapes somewhere whole in the middle) this helps our galaxies look more realistic and cool. Students usually need reminders to stick all properly, I tell them it needs to look like ONE piece of paper, or the visual effect will not be appealing! We got lots of compliments with these project!