Middle School Art, Uncategorized

Watercolor 4 view paintings

This was one of the hardest lessons I have given to my students. I could feel the pain, but it was a wonderful learning experience, because I totally took them out of their comfort zone (me included) and explored new terrain.

There were many learning objectives in this lesson, the first one being composition. I started by choosing some landscape pictures online and putting a selection of 7 in a google spreadsheet, and asked them to sign up for one. There were forests, beaches and mountain views to choose from. I then printed out for them, as each student needed their own picture, I wanted them to focus on it all the time. We started by dividing our sketchbooks in 4 by using artists tape (masking tape works). I like to “damage the tape” before adhering it to the sketchbook by putting it on my clothes first, then it goes on the sketchbook, this will make the peeling off part easier. You need a frame around the sketchbook and then a cross dividing it in 4 equal parts. We then proceeded to make view finders, I handed scrap paper and rulers, and asked students to measure the rectangles in their sketchbook (all 4 should be the same size) and outline the same measurement in the center of the scrap paper (which was A4 paper cut in half). They cut out and ended up with a frame, the same size of our rectangles, and we will use the frame to find interesting views (composition) in our picture. This brings me to the next objective: the rule of thirds. You can read more on it here. You should play around with your frame until you find a good view, then proceed to outline that view with a pencil, very lightly. Do the same in the other 3 squares.

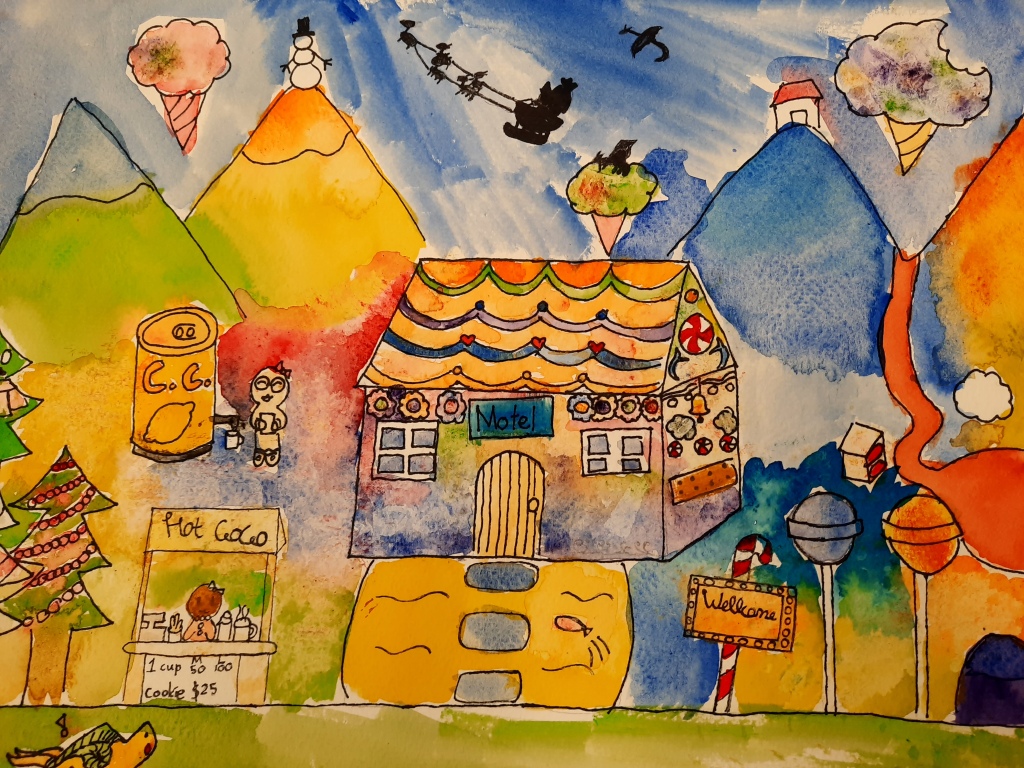
Once we have 4 views outlined, we can paint using watercolor, for which I gave only one simple direction, go from light to dark. Watercolor is different than acrylics or temperas, as we work in layers, starting with the lightest colors, then we add darker shades as we go, paying attention to where the dark spots are and the textures. This was completely new to my students, so it took a lot of trial and mistake, in the end I noticed that the ones that worked out best were:

a) fearless students

b) coachable students

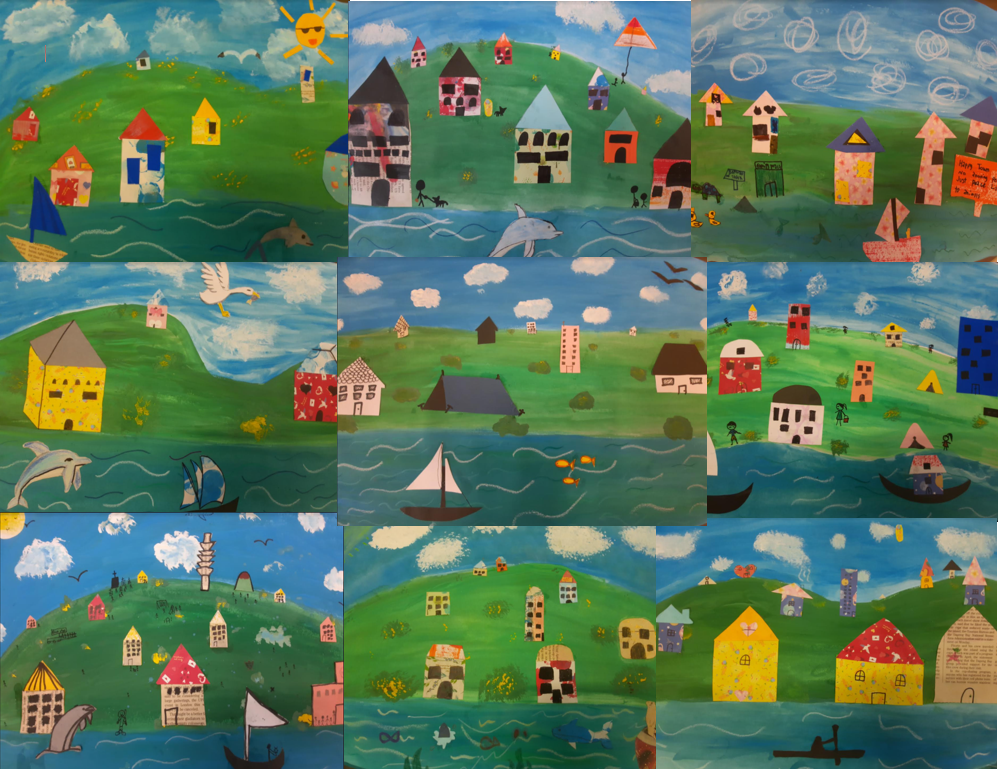
No surprise uh? It was nice to peel off the tape and see (some) resemblance in our projects. Practice makes masters, enjoy!

Uncategorized

Kindness Art Projects Galore

During the month of November the school counselors and the art teachers worked together in an antibullying campaign at our school. Students made videos, art projects, educational posters and more to rise awareness on the cruel reality of bullying, and to teach them how we can be an upstanders and how we are responsible of our own school environment.

With younger students I focused on Kindness and what does it mean to be kind. We talked about the traits that good friends have, and throughout the month we talked about writing nice notes, saying hello or good morning, inviting classmates that are lonely to join us in playing, smiling to others and so on. Grade one students made a “BEE KIND” art project with flower vases, roses and bees. We made Ming vases for our flowers too, giving me an opportunity to talk about patterns and ask them to fill in the vase using them.

Grade 2 Students worked with bringing phrases “alive” through a collage. They needed to write phrases such as “Kindness is….smiling often”, “Kindness is….. a friendly hello”, “Kindness is…..making someone smile” and so on. Once students chose one they used paper cuttings to assembled a collage, I used body templates to start with, then they could continue dressing them up and adding details.

Grade 3 students worked with Kindness Quotes and Calligraphy written in a marbled paper, some quotes like “Kindness is Free….Sprinkle it Everywhere” turned very popular….kids do like sprinkles don’t they?

We had been working on paper marbling so those were ready to go! You can find directions to paper marbling here.

Grade 4 students wrote acrostic poems, I gave them a selection of words that resonated with the topic, and after choosing one, they went on to write their poems. We also used a marbling technique to decorate the borders, using less water in the pans and holding them carefully to dip them down one side at a time.

Upper Elementary and Middle School worked in teams to make Anti Bullying educational posters using basic supplies (markers, scraps of paper, glue, scissors and tempera disks), I gave them a presentation about Bullying Facts and they were sent to work with their teams. These are some final products:

It was great to reach the target, all students thought, talked about and represented in an artistic way how we can be a good friend, how to be an upstander and not being mean to others.

Art Projects Grades 4 and 5, Middle School Art, Uncategorized

Design your own Gingerbread House

Students love to design, for this class I (early December) I asked them to design their own Gingerbread House.

I gave them a few guidelines:

  • Use a ruler, this way wobbly designs look well done and professional. Shapes could be as simple as they liked, but I asked them to make sure they were straight.
  • Use perspective, I reminded them of 3 sections in our landscapes, we have the background (usually the top of the paper or the sides), the middle ground (usually the center of the paper or between the center and the sides) and the front ground (found at the bottom of the paper or the center). Depending on their design, they should add 3 different sections, variating sizes to give the illusion of deepness.

I always remind to the students to sketch lightly so there are no erasing marks. Once the design was completed, they outlined with a permanent marker (ink, sharpie). I then gave them time to have fun with watercolors, my students are still learning and experimenting with them, I can see they are learning to adjust the right water to paint ratio and to control this runny medium as they go.

Some designs were very creative, I had a pirate boat (all made out of Ginger), a futuristic looking lake house, a House inside a water globe, a design transformed into a puzzle and so much more.

Have fun!

Uncategorized

Adorable Snowmen for the little ones

My students always get excited when I tell them it is time to make Christmas art projects. I like to start early so I have the finished work decorating around on time.

This year I had lots of A4 light brown cardboard, so I decided to paint snowmen there instead of the usual light blue cardboard, and asked my Grade 2 students to use the white tempera paint to paint a hill (or a flat ground) followed by one or more snowman, with two or more “bumps”. Once that is completed, they can add snowflakes with paint and/or stamp white dots using Q-tips (earbuds). My students LOVE to splash white paint on top of their artwork but this year my Grade 2 classes are quite big and I decided we would stamp snow instead. Let dry.

Next class I handed brown and black markers to add eyes, mouth and arms, I told them to keep it quite simple this time, so they look cute, “today less is more”, they then could choose buttons from a container and some sparky snowflakes I found at a craft store, and glue them up with white glue. Once they finished that part they came to the front table where I had orange paint and added a nose, then took their work to the drying racks. It was a quick and simple project to put together, and the snowmen turned out really cute!

Enjoy.

Uncategorized

Landscape collages

This project was inspired by http://www.thatartistwoman.org there are great projects in there for art teachers. Thank you Gail!

We started by dividing our paper in 3 sections, then I handed the students blue and green tempera paint. They needed to paint the sky with blue, the hill with green and then the waterfront with a mix of those two colors. Students could make a flat landscape or a hill shaped view. Once it dried out, they painted in clouds and bushes if desired, and then, they added houses and water / sky objects using paper cuttings from leftover paper prints and patterned paper as well as old newsprints. I handed prints of different shaped buildings, water objects and birds for inspiration, but they were also encouraged to come up with new ideas. The important lesson here was, objects that are closer to the viewer are bigger and those further are much smaller. I asked them to use at least 3 different sizes of buildings and place them in the right “spot”. The optical illusion is great only if we have small (tiny) buildings or houses on the back of the hill (near the top) and much larger objects closer to us (the bottom of the land, near the waterfront). Once the glue dried up, they used oil pastels (white, green or blue) to add waves and markers to add windows and additional details to their artwork. They turned out very colorful and looked great exhibited in the windows!

Enjoy!

Uncategorized

Cave Art (Art History Level 1)

This is the very beginning of Art History, for Grade 1 Students.

I introduce students to the very basics of Cave Art using a power point with actual pictures of this form of Art. We talk about how did people live back then, and then we discuss how could they paint without brushes, paint stores and canvases or paper. Why do we paint to start with? This is a very vivid discussion, that leads to explaining that we do Art to express ourselves, how do we feel at a particular moment, or how do we feel about a particular situation. We paint for the sake of creating something beautiful, as well for the sake of changing something (activism). We create art to tell a story as well, which is why (most likely) cavemen painted on the walls of caves.
We also talked about using what is around in nature to paint. I demonstrated this by rubbing soil and a leaf on a white piece of paper. Students noticed that we can use nature’s pigments to color something. Back then, they found pigments in minerals, plants, fruits and even animal’s blood.

Soil and a leaf rubbed on paper

We then talked about identifying basic shapes in objects we want to draw. I showed them how to identify rectangles, triangles and circles to outline a simple animal. I then handed outlines of cavemen hunting and animals (a quick google search away) and asked my students to draw a story on their cave wall (light brown colored cardboard). Students this age can be very creative. Last but not least, we talked about coloring neatly and outlining a drawing (we used colored pencils for coloring and markers for outlining) to make it look finished and neat. We also “signed” our work by tracing our hands on the back of the paper.

Enjoy!

Art Projects Grades 4 and 5, Middle School Art, Uncategorized

NOTAN: Dark and Light Balance

As part of our Japanese Art Unit, we talked about the Japanese concept of NOTAN. The translation is “dark and light balance”, and we discussed how an artwork can be enhanced by properly balancing the light and the dark colors in a painting. We made paper NOTANS using scissors and colored paper. Students were asked to design their own notans and to draw on all 4 sides of the paper.

STEP 1. Take the colored paper square, place it on top of a larger piece of white cardboard and mark the location of the corners (using a pencil) on the cardboard where you will glue your Notan once you finish. This small marks will help you align your paper as you work on the sides.

STEP 2. Design simple drawings, these can be abstract or you can follow a theme of objects and drawings. I asked my students to use all four sides of the paper. Some didn’t forgot and made two only as you can see in the pictures, but most used all four sides.

STEP 3. Cut out one side at a time, don’t forget to add a second cutting inside the cut you just made, and stick to the cardboard as you go, the first (largest) cut is glued outside and the second cutting (smaller) goes back inside, this will make more sense as you star working on it.. Make sure you align with the marks you traced using a pencil and re-aligning the colored paper as you go.

STEP 4. Make sure all is glued up properly, check for “flappy” pieces of paper and stick them so it looks like ONE piece of paper. The center paper (where you cut the shapes from) is aligned and glued up at the end.

Art Projects Prekinder and Kindergarten and Grade 1, Uncategorized

Watercolor Names

This is a good first class project for Kindergarten, and also a good introduction to wax resist.

I hand wax crayons and ask students to write down their names in their sketchbooks (or a sheet of cardboard), as many times as they can fit. Most of them wrote their names 3 times. I ask them to change colors for every letter, they can repeat colors, but not consecutively.  I have done this with Prekindergarten classes, but I write the names for them with pencil a few times and then ask them to trace on top using crayons.

Once all the letters are ready, they can use watercolors to paint on top of each letter, changing colors every time.

Enjoy!

6223622515888399877181588839993681

Art Projects Grades 2 and 3, Uncategorized

Spacescapes

This project was the perfect example of forcing myself out of my comfort zone for good.  I am just not into space stuff AT ALL.  I asked grade 3 kids if they would like to try out space stuff art and they got excited! And in the end I think it was grade 3’s most popular project. I linked this to both social studies and science, as their classes were into the phases of the moon and modern day inventions (satellites).

We started out by sketching different objects we wanted in our spacescapes. They needed a moon in any phase they preferred, and they needed one extra large object, one or two medium sized objects and as many smaller ones as they could fit.  We sketched the shapes in A4 cardboard, and the extra large object needed to be as big as they could fit.  Some students used 2 sheets for everything, some 3.  I always emphasize that they sketch lightly and that they identify basic shapes inside the objects they are trying to sketch. I handed printed out images of planets, the moon, moon vehicles, spaceships, people wearing space suits, satellites, meteorites and more.  Once students sketched what they wanted in their spacescapes, they proceeded to outline and color using oil pastels (for bigger shapes) and markers (for more detailed, smaller objects). I explained how to blend in pastels, to start with the medium color and then enhance with lighter and darker shades.  The moons turned particularly cool using this technique, we started coloring roughly with gray then adding texture with darker gray and black and some white. We also splashed white acrylic paint on black cardboard, to make our galaxies. Once all the objects were nicely colored, we cut out the shapes and arranged in the dried up galaxies.  I reminded students to play a bit with composition, and to place some objects in the corners and then cutting them out (you don’t want all of the shapes somewhere whole in the middle) this helps our galaxies look more realistic and cool.  Students usually need reminders to stick all properly, I tell them it needs to look like ONE piece of paper, or the visual effect will not be appealing! We got lots of compliments with these project!

Enjoy.

20200504_112955

Art Projects Prekinder and Kindergarten and Grade 1, Uncategorized

Popsicle collage

Kindergarten students enjoyed making a Popsicle Collage using bleeding tissue as a coloring medium.

I handed a stencil with the shape of a Popsicle and asked students to trace 3 on white cardboard, using a pencil.  Once they had them outlined, I handed tissue paper cut out in small pieces, as well as water buckets and brushes.  They had to add water to the Popsicle surface, then stick pieces of tissue paper on top. It is OK if the pieces come out of the outlines, we will eventually cut out.  Let dry completely with the pieces of paper on top.  Once it is dry, dispose the paper cuttings. Hand the paper back so students can cut out the Popsicle shapes.  I asked students to color the background of a page in their sketchbook (or use a plain piece of cardboard) using crayons.  I show them how to color quickly and evenly by placing the crayon horizontal on the paper, then using the long side to color (we usually hold vertically and use the tip to color).  Once the whole page is colored, I asked them to think of a simple shape they can repeat all over the page, to make a nice pattern.

Once you have the background ready and the Popsicle are cut out hand long strips of brown paper (to make sticks), and then explain how to arrange the shapes around the paper, we can cut out one in half and add half of a Popsicle in one of the borders, so it looks like it did not fit but it is “outside” of the paper.  I always ask to move around and play a bit with composition before deciding where to glue up the pieces.  Enjoy!